Issue:
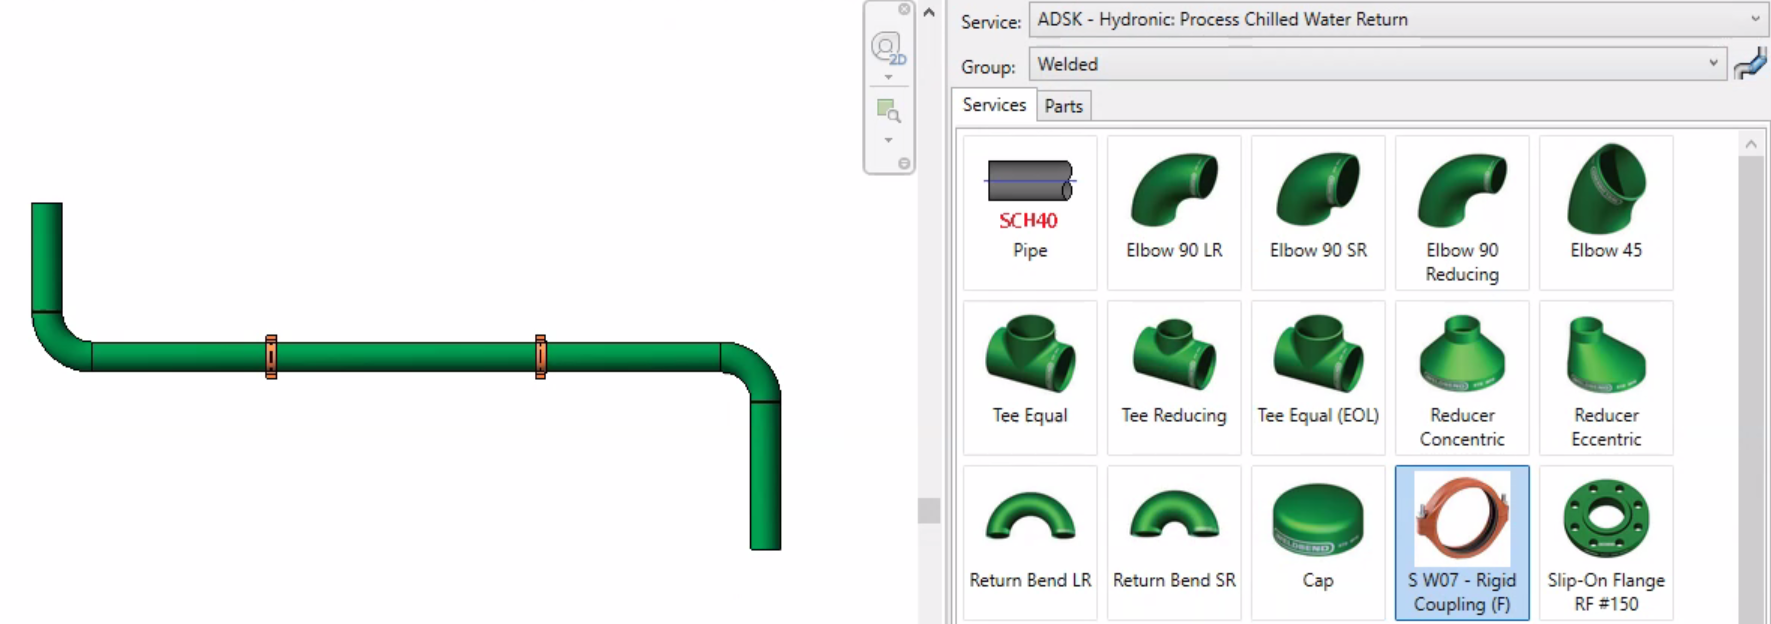
In Revit, you can specify that piping end connections update from the fittings attached to them. For example, grooved couplings can break into welded piping systems and properly update the end prep settings on the pipe. An example is shown in the image below.
This new functionality is documented in the
Revit 2019.2 Release Notes improvements list as:
- Added the ability to automatically match connectors when connecting parts with mismatching connectors.
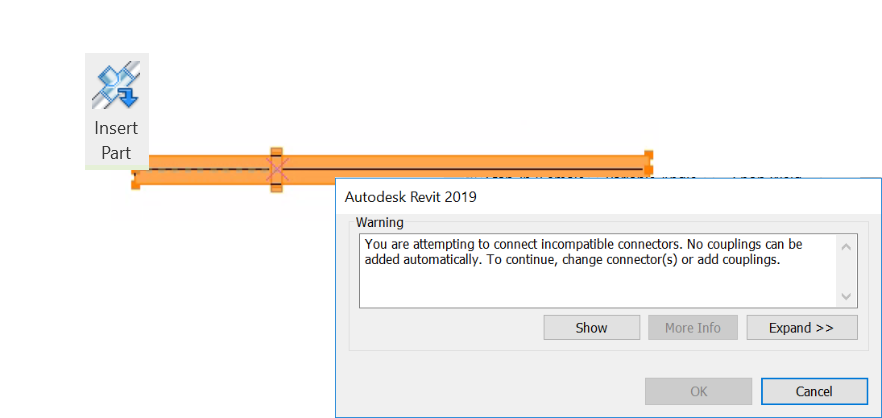
Without these settings, if you attempt to use the Insert Part tool to insert a grooved coupling into a welded pipe, Revit displays a warning indicating that the connectors are incompatible as shown below.
To use this functionality, you need to make three changes within your fabrication content configuration:
- Modify the specification that are assigned to pipe segments you want to adapt to attached fittings.
- Update the pipe itself to ensure that the connectors are unlocked, and thus, can be updated by the attached fittings.
- Define what type of connector to apply to the pipe for each connector you may be connecting to it.
To make these changes, you must install the 2019.1 update release of CADmep, ESTmep, or CAMduct or later. You must also install Revit 2019.2 or later.
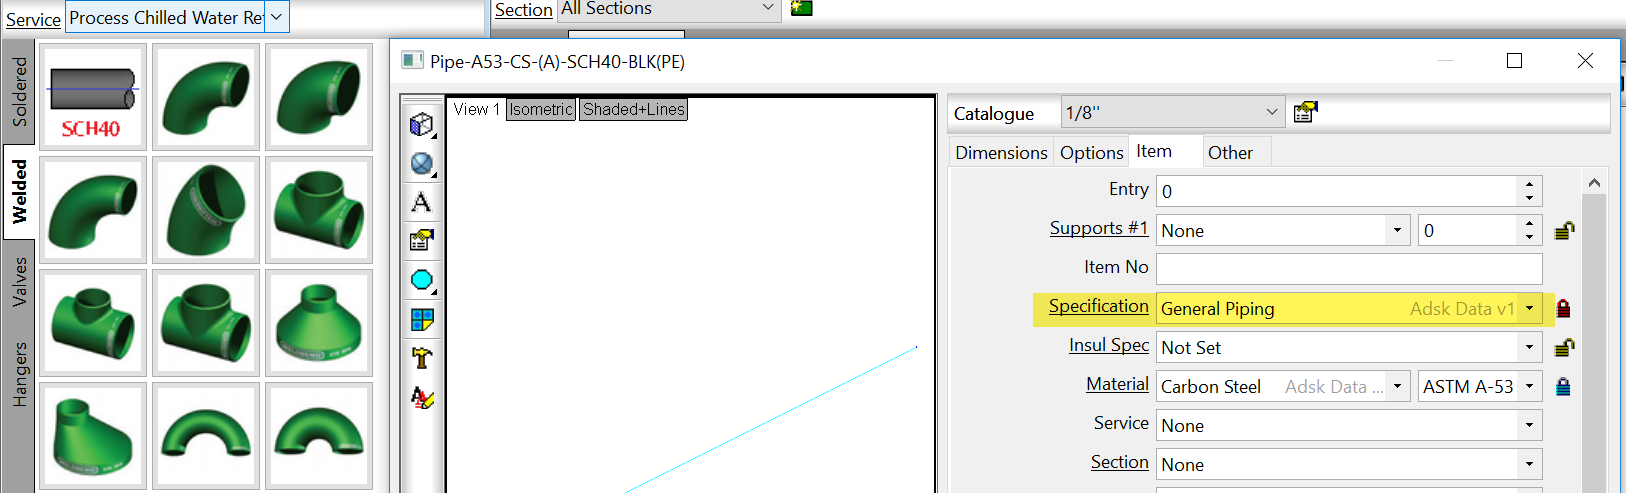
Modify the Pipe’s Specification
In the image below, the selected pipe is in the Imperial V3.06 Catalog, and is assigned to the General Piping specification. Click the field name,
Specification, to open the Specification dialog.
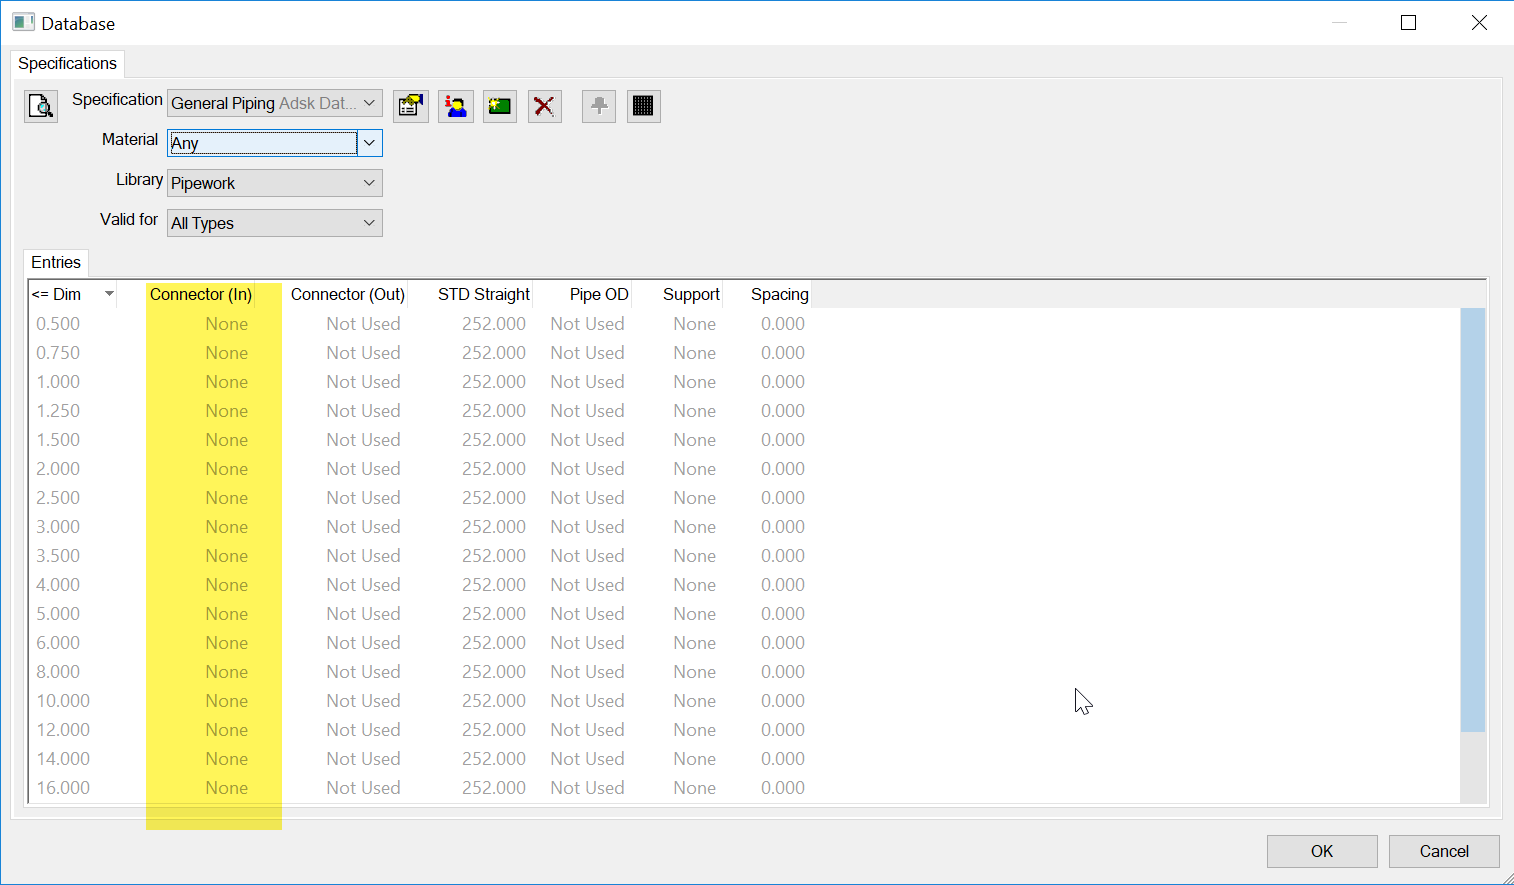
In the Specification settings, for Material, select Any, and set the
Connector (In) setting to
Not Used.
 Note:
Note: This is an example only. The image above is from the Revit out of the box content and is read-only, as it has ownership locks applied. You can only perform this step on your own content. If you obtain content locked from a third party, you will need to request that they make this change for you. If you are working only with the out of the box Autodesk content, you will need to make a copy of the specification, and make sure to apply that specification to all your content as applicable.
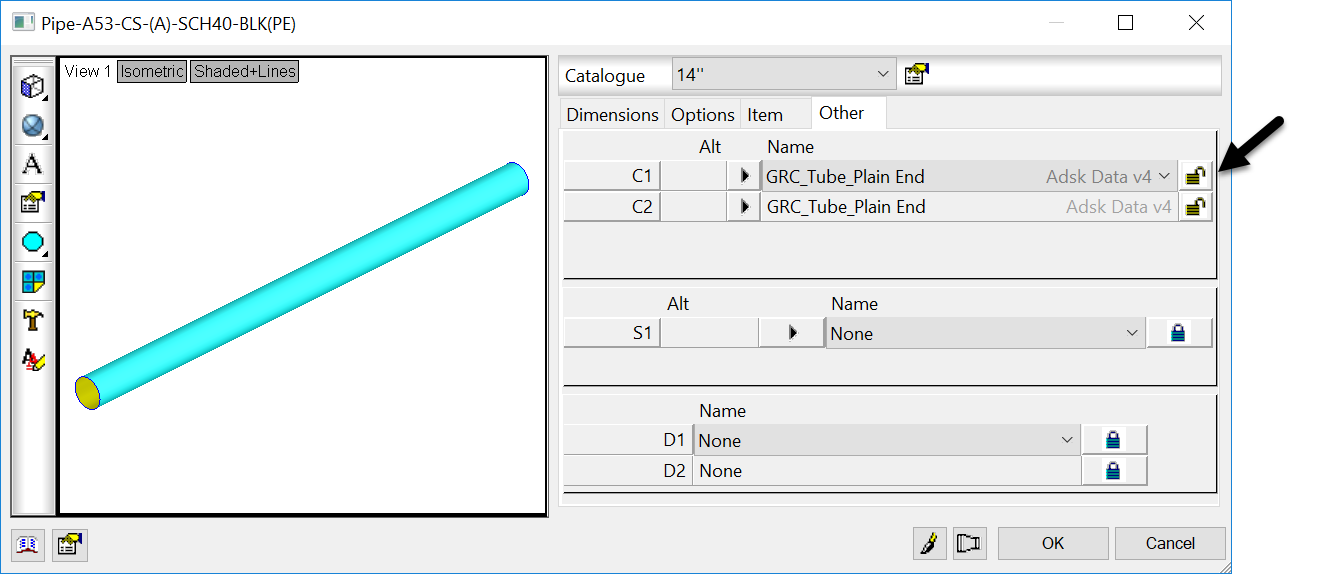
Set Pipe Connectors to be Unlocked
For the pipes that you want to adjust to accommodate the connectors of components that will be connected to them, you need to unlock the connector. This allows the connector to be updated as needed. Click Unlock for each connector as following:
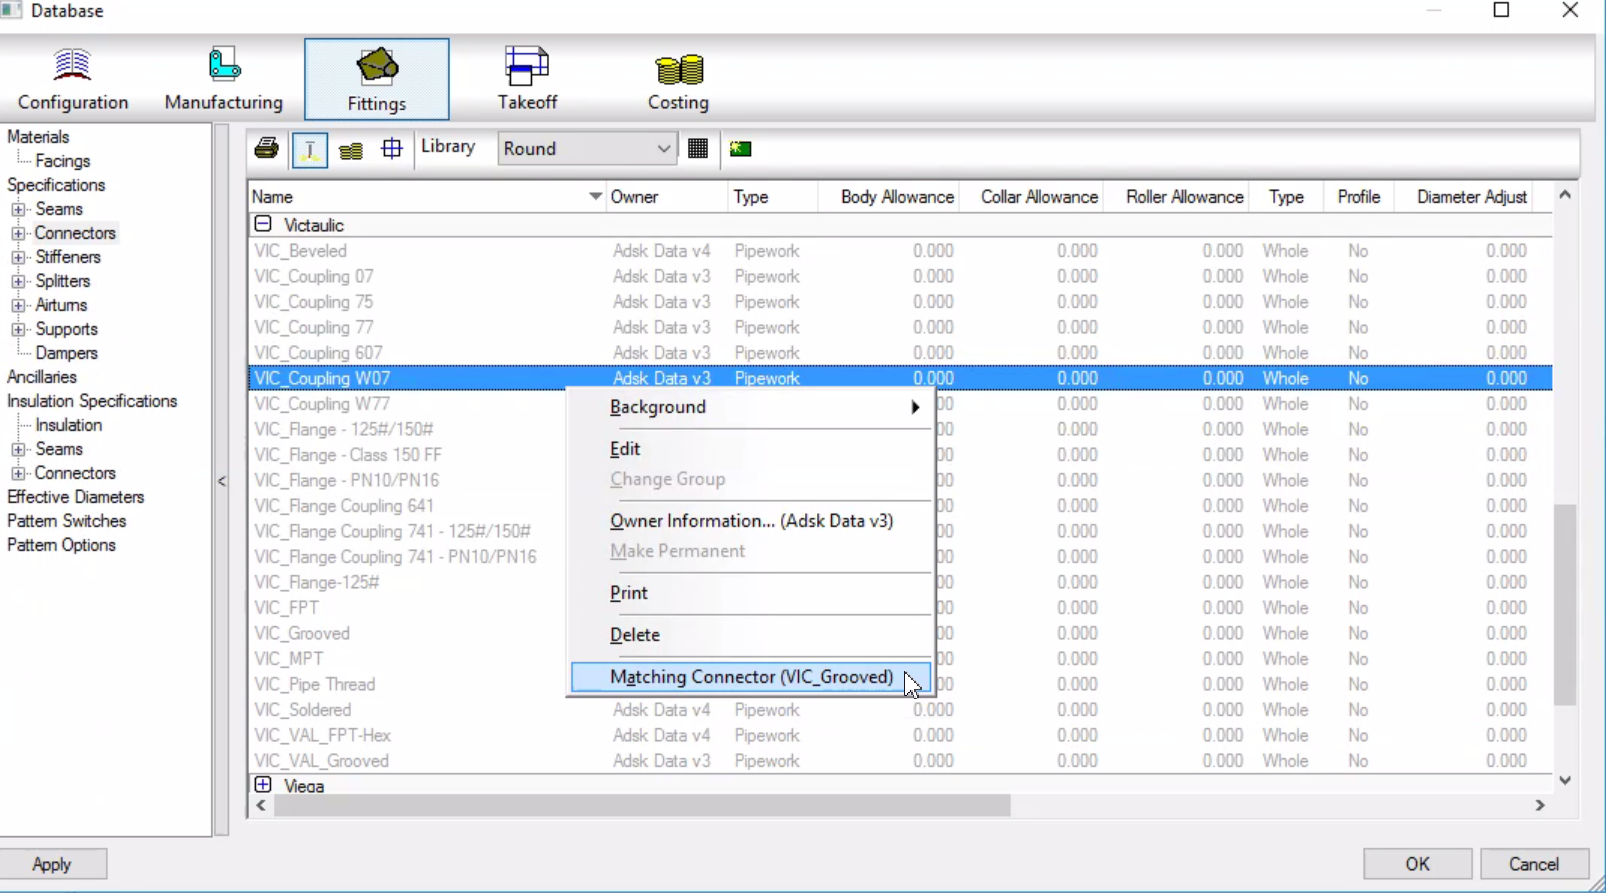
Set the Matching Connector
The last step is to ensure that the connector on the fitting knows what type of connector to apply to the pipe. Use the new Matching Connector property found on the right-click menu for each connector. In the example below, the VIC_Coupling_W07 connector has been updated with the Matching Connector set to (VIC_Grooved). When you place a fitting that has the VIC_Coupling_W07 connector into a pipe, that pipe will inherit the VIC_Grooved connector to properly mate to the fitting.
After you make these changes, reload the configuration into Revit 2019.2 or later to use this functionality. Use the Edit Part dialog to manually unlock connectors for any pipes that are already in your model. Any new pipes you place will already be configured properly for this functionality to work as expected.


