Welcome to Maya 2022! You can access Maya 2022 from your Autodesk Account.
Read on to learn a bit about the new features and updated workflows you'll find in this release. For technical details included What's Fixed, see the Maya 2022 Release Notes.
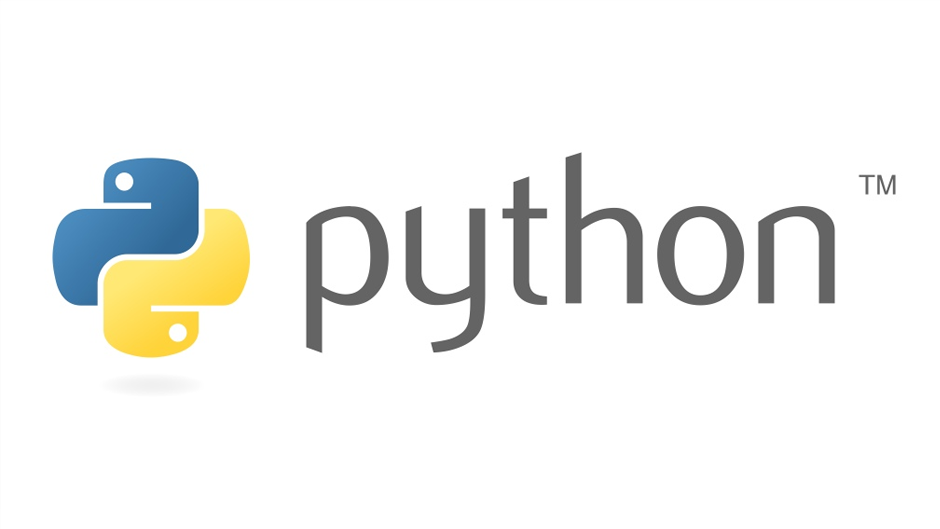
Maya 2022 is all about helping artists work more efficiently and collaboratively. Marking the arrival of the USD plug-in for Maya, this release also delivers substantial updates to your favourite animation, rigging, and modeling tools in Maya. With new support for Python 3, new plug-ins from Bifrost and MtoA, there's a lot to make both artists and technical leads happy. Dig into this What's New to find out more on the new features and updated workflows below.
For more on the evolution of Maya over the years, check out the Maya timeline on Autodesk AREA.


More features
What else is new?
Yes, there's more!
Time Editor Additive Blend for Animation clips
A new Blending Mode option has been added to the Time Editor Clip contextual menu letting you choose between the Normal (default) blend mode and a new Additive blend Node, which evaluates the clip relative to its first frame and adds it to the animation, instead of blending the two clips together. To access these options, right-click a Time Editor animation clip.
The new Additive mode is useful for layering motion from one animation clip onto another one when the primary animation in each clip occurs on different parts of the character, for example, adding a hand wave animation on top of walk cycle.
The clip displays its Additive blend status with a plus sign next to its name.
Evaluation Toolkit improvements
The following tools have been added to the Evaluation Toolkit to let you to better visualize graph connections.
- Graphical Output
- A new Graphical Output subsection has been added to the Evaluation Toolkit in the GPU Override area containing options for generating GPU deformer graphs with Graphviz.
- deformerEvaluator command
- A new argument dumpInfo or di has been added to the deformerEvaluator command. Executing deformerEvaluator -di lets you print debug information about the deformer evaluator's clusters in JSON format.
High resolution textures now supported for 3D Paint
When painting on a 3D object, you can now save textures at a size of up to 16k.
Textures larger than 4096 x 4096 may yield slower performance. See Paint on a 3D object for more information.
Standard Surface can now be imported and exported via FBX
Standard Surface materials are now included when importing or exporting an object or a scene using an FBX file.
New Standard Surface shader default values
The default values for the Standard Surface shader have been tuned so that you can start your shading with fewer steps. The look of your material should remain the same in the viewport and in your software render.
If you use HDR lighting in your scene and your shader appears too bright, you can calibrate the scene by setting the Base Color value to 18% gray range or by setting RGB = 0.18. You may encounter this issue with shaders where the base color is not mapped to a texture.
Reserve namespaces for unloaded references
When creating a reference or opening a scene that contains references, you can now choose to create and reserve the namespace for a reference even if you do not load the reference itself. This prevents the namespace from being used inadvertently for other nodes and references, causing conflicts when the original reference is eventually loaded.
New CPV Modulate blending mode added to Layered Textures
A new CPV Modulate blending mode has been added to Layered Textures. In this mode, layers are blended per-component (RGBA) based on the active per-vertex color and alpha values (CPV).
New RGBA display channels added to the Paint Vertex Colors tool
The Paint Vertex Colors tool now allows you to display the RGB channels individually, to give you a better idea of those specific channel color values when painting. You also now have the option to display the Alpha channel as a greyscale on the object surface instead of as a transparency.
Pivot snapping to other objects
You can now snap an object's pivot to other objects' edges or vertices in Edit Pivot mode using the usual snapping hotkeys. This is great for quickly aligning components on two different objects relative to each other.
Vertical splitter bar for Outliner
A new option for dividing the Maya Outliner layout vertically has been added. Now, in the Outliner Display menu, a Window Layout rollout offers the choice of displaying the Outliner content either horizontally or vertically. Splitting the Outliner vertically lets you maximize vertical space which is useful when working with many objects in a scene.
Performance enhancements
- Hybrid Cache setting
- A new option in the Cached Playback Preferences and Evaluation toolkit Caching section, Hybrid Cache, combines the benefits of Cached Playback with GPU deformation for even better performance and memory usage when working with use large geometry.
Improved support for Retina/high-DPI (4k) displays
Previously, 4K monitors at the default setting rendered the Maya Viewport at low resolution, resulting in unintended pixilation. Attempts to adjust for this distortion resulted in a higher-quality but unreadably small appearance. Efforts have been made to address this issue and Maya now renders at native resolution on high-DPI screens.
Known issues
- Plug-in widgets that use OpenGL drawing: High DPI support must be provided by the plug-in authors.
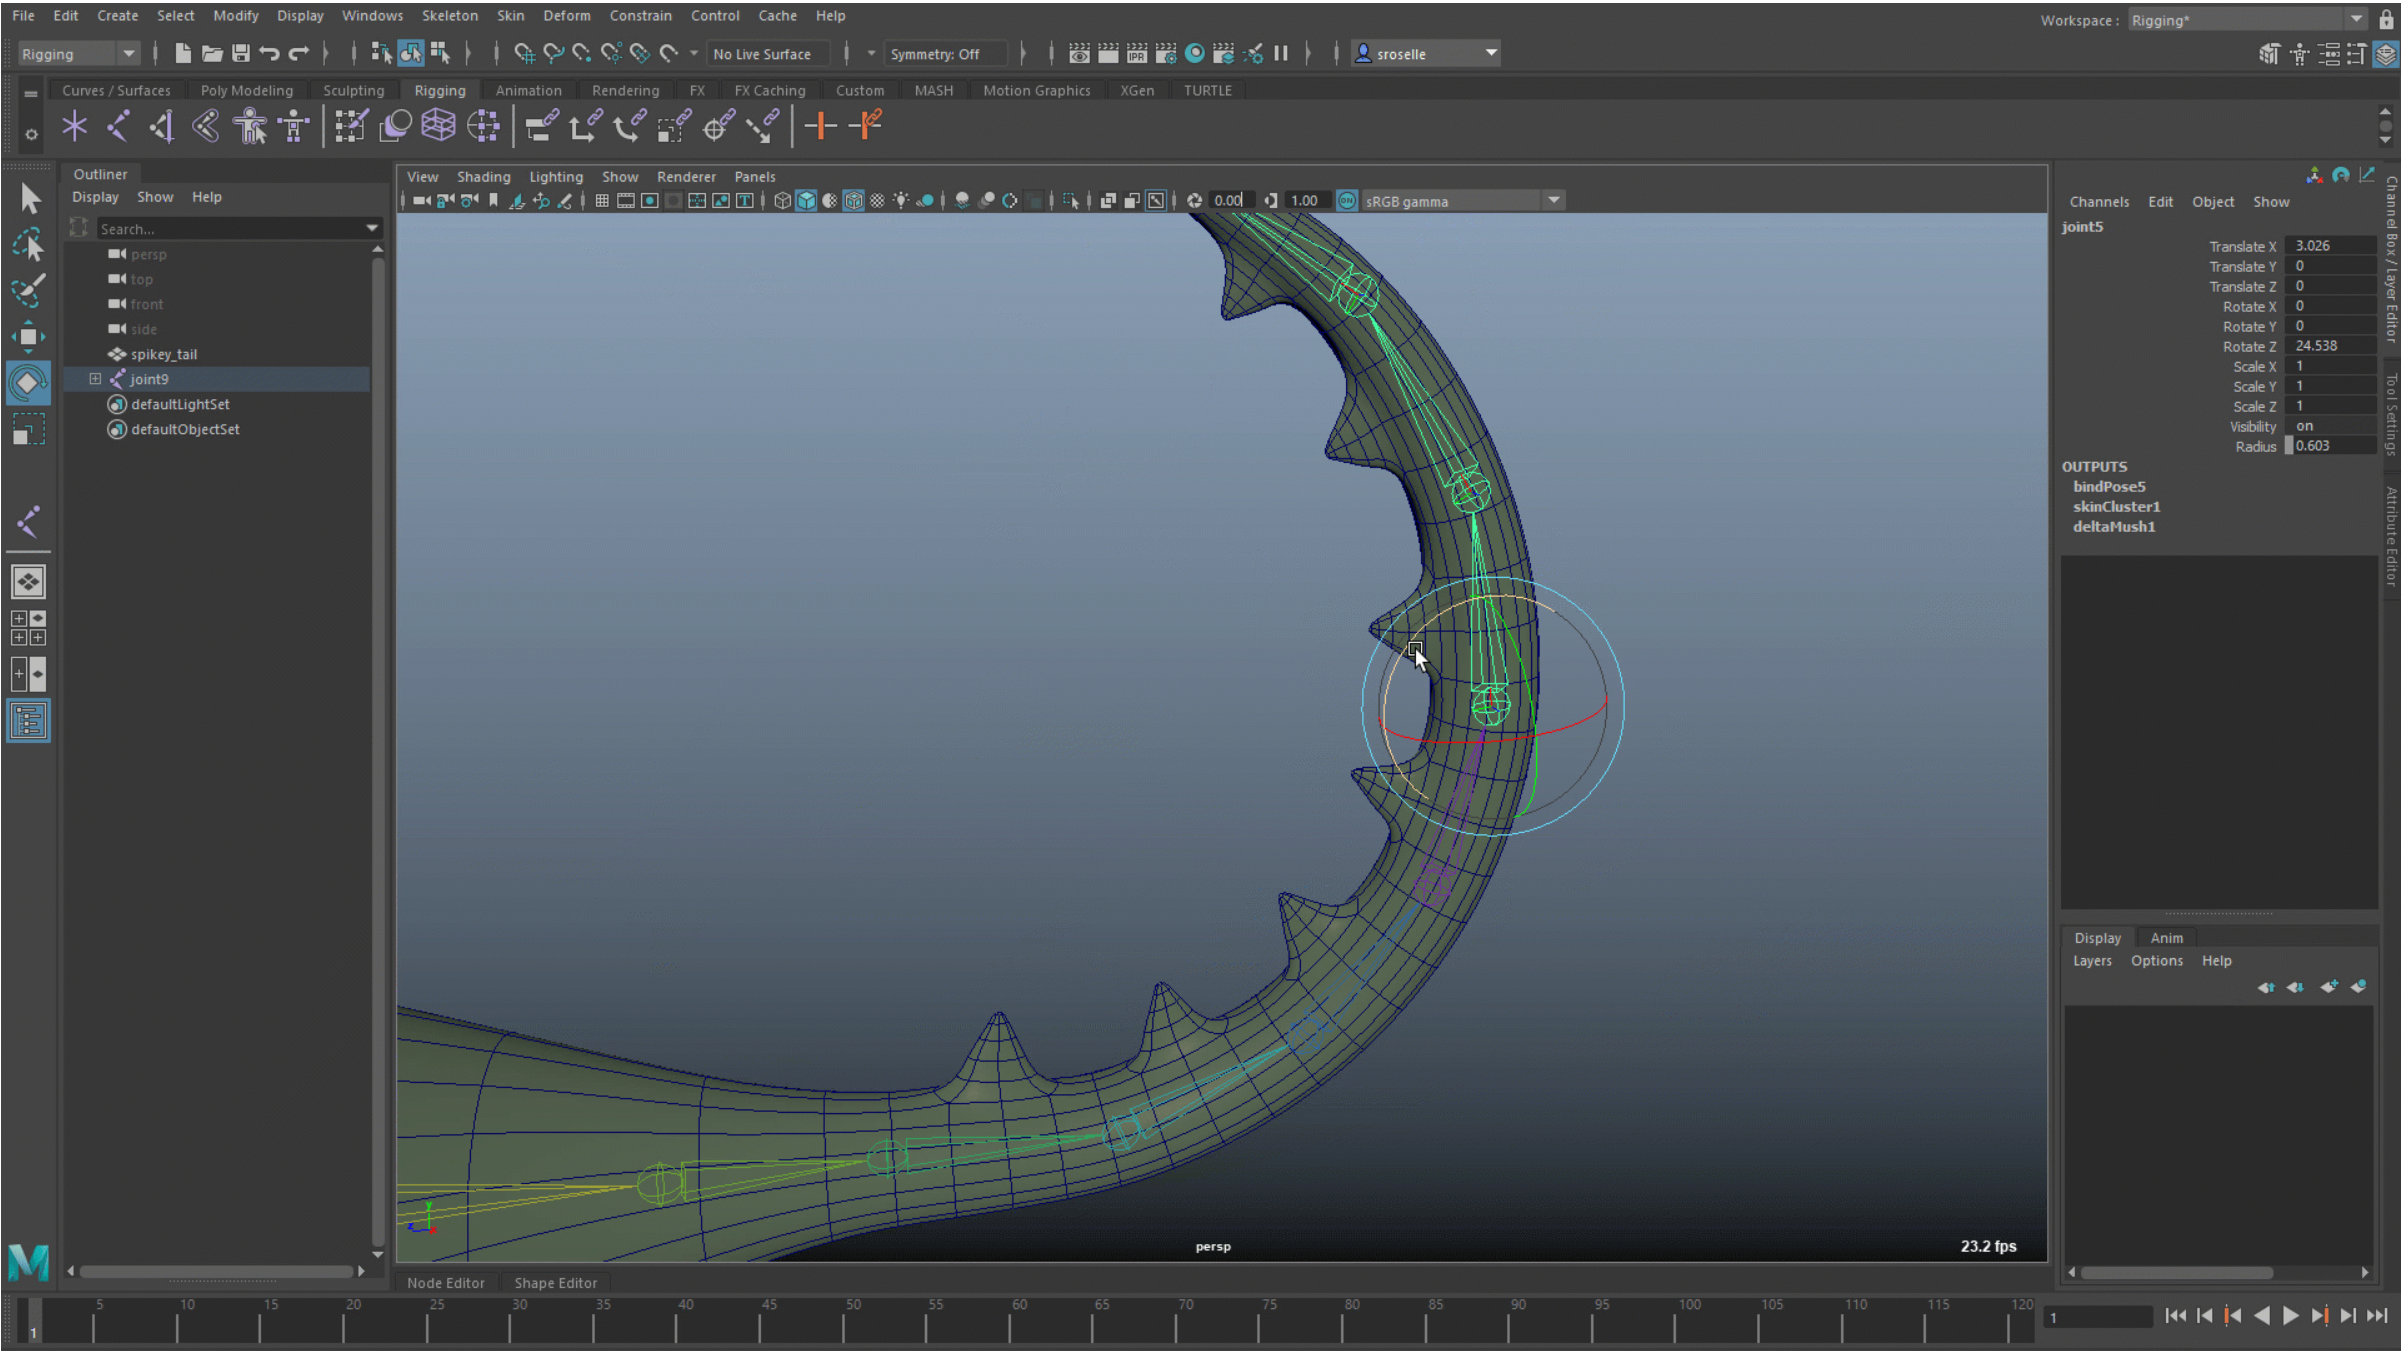
Curve visibility
A new display option has been added to the Attribute Editor specifically for curve shape nodes: Always Draw on Top.
Located in the Attribute Editor Object Display section of a curve shape node, turn on Always Draw on Top to make a curve visible in the Viewport even when it is hidden by other objects in the scene. This is useful when working with control rigs to expose curves used as controllers on top of other objects in the Viewport. See Display Attributes.
New Snap Transforms plug-in
A new plug-in has been added to work with Matrix-driven workflows: snapTransform. The snapTransforms plug-in lets you bake a transform's current position or simultaneously reparent and bake a transform. It has options for baking over a frame-range, and controls for transforming components to bake (SRT & Shear), alongside settings that preserve pivots or the offsetParentMatrix, while keeping visual transforms at the same location.
The snapTransform plug-in utilizes MDagPath.matchTransform functionality and is an experimental developer plug-in. To use the plug-in, use Python OpenMaya and maya.cmds.
To load the snapTransform plug-in, select Windows > Settings/Preferences > Plug-in Manager > snapTransform.py. For a list of flags you can use with this plug-in type -help.
Create sets easily with the new Outliner Sets contextual menu
You can now easily create sets and quick select sets from objects, as well as create partitions, using the new Sets sub-menu in the Outliner contextual menu. Select one or more objects, then right-click and select Sets, then choose from menu items that create sets or edit their membership.
You can also automatically select set members when you select a set. To enable this behavior by default, enable Preferences > Selection > Modifiers > Auto-select set members in the Outliner.
Reduce artifacts on partially-transparent surfaces in the viewport
A new Alpha Cut Prepass feature has been added to the Viewport 2.0 options that combine the benefits of the Alpha Cut transparency algorithm with any other (alpha-blended) transparency algorithm such as Object Sorting and Depth Peeling. Enable this option to help reduce or eliminate artifacts from these transparency algorithms.
Import option for Animation Layers
A new option, Merge Base Animation Layers has been added to the Import options to let you merge the base animation layer of an imported file with the base layer animation already in the scene. Turning this option on is useful when working with scenes where many assets are imported.
The default setting is off and imported layers are moved under the current base layer.
The new behavior is activated by setting the command mergeBaseAnimLayer(mbl) to True.
Paint Skin Weights Tool improvements
- The Filter Influences field behaves the same as the Outliner Filters, making it easier to locate and select influences you want to work with, especially if you have a complex rig. Previously you had to add special characters to filter in the Paint Skin Weights Tool, unlike in the Outliner.
- If you have faces or edges selected on a skinned mesh when opening the Paint Skin Weights Tool, your selection is now automatically switched to vertices, letting you begin painting weights immediately.
- Refresh of the Influences list after you perform various operations like Remove Unused Influences or Add Influences is now improved.
- A small issue with the Expand Influence List button shifting to accommodate a vertical scroll bar is now fixed.
GPU Support and Selection Sets
The behavior of Tension, Delta mush, and Solidify deformers when using subsets has changed to accommodate GPU support.
In versions of Maya previous to 2021, if you used a subset of the geometry with these deformers, the selection set would be internally expanded by one polygon connection level, and those vertices would be assigned as anchors.
In the new behavior, only vertices within the subset are used by the deformer. If you want to restore the original deformer behavior, use componentTags to expand the selection set.
Precise UV placement
New U and V fields in the UV Editor's section allows you to view or set precise UV space values for a selected UV.
Matrix widget improvements
- Number field backgrounds now display the current attribute state: yellow for connected, and grey for locked.
- Fields are not editable when connected or locked.
- When the attribute is locked, right-click to lock the values
- When the attribute is connected, right-click to show the name of the connected node (clicking this takes you to the connection), Break connection, and Lock.
- When the attribute is unlocked and disconnected, right-click to Set Identity, invert, or lock the matrix.
See Edit Transform Offset Parent Matrix attributes.
blendShape fixes
An issue where selecting or setting keys on per-vertex weight attributes caused Maya to become unstable has been fixed. This instability occurred when keyingblendShape.InputTarget.baseWeight attributes because Maya generated attributes for each vertex, which in some cases would be excessive.
To address this issue, per-vertex weight attributes have been set to non-keyable. If you want to key these attributes, use the Script Editor or the Key Selected or Key All Keyable menu items in the Channel Box Channels Tab.
The Set Driven Key window appears after selecting Key > Set Driven Key > Set… It had previously not launched because of Maya freezing.
Export support for editMA
EditMA is now offered as an option in the Maya Export All/Selected Options File Type menu, along with Export to Offline Files Options, letting you export characters with deformers connected with editMA files.
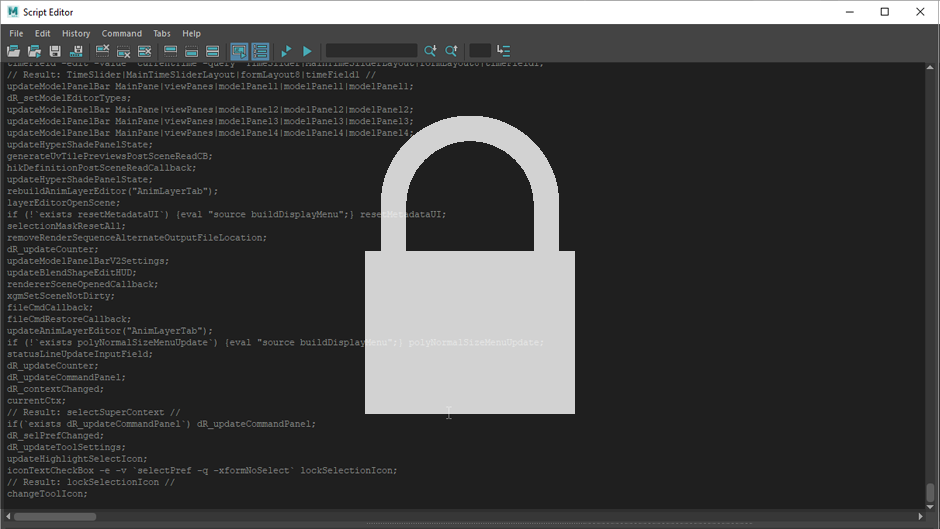
Improvements to the Script Editor
New options have been added to the Script Editor, making it easier to work with tabs.
Similar to the tabs in a web browser, you can right-click a tab in the Script Editor to access options to create, rename, or delete tabs. Updated Script Editor hotkeys are more intuitive, and you can now close a tab by middle-clicking or clicking X. The tab options have also been moved from the Command menu to the Tabs menu.
Vector renderer not loaded by default
The Maya Vector renderer is no longer auto-loaded by default.
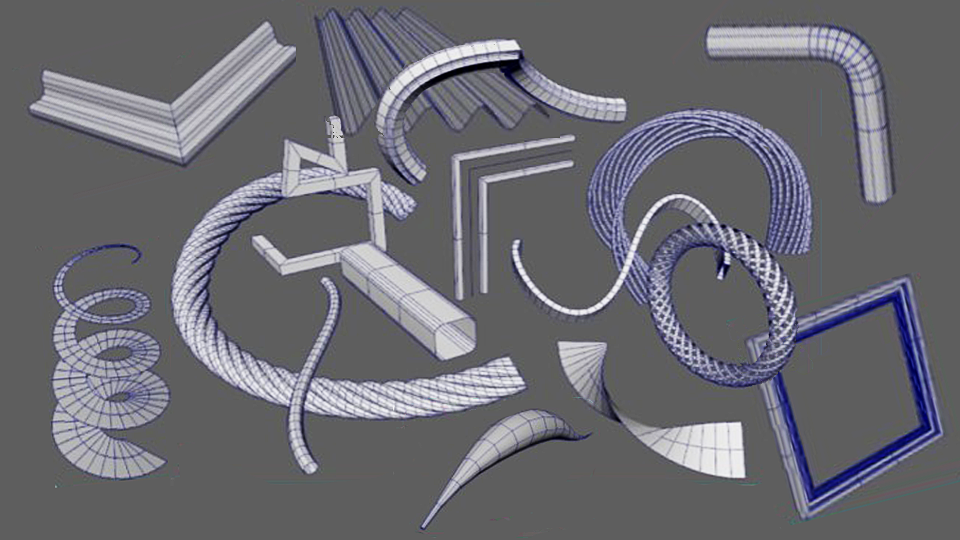
Support for Curve Input with UV and Proximity Pin
The UV Pin and Proximity Pin Matrix operators now work with curve animation and NURBs. Previously, using these operators with curve animation created superfluous nodes in the scene.
The UV and Proximity Pin nodes use arrays as input and outputs an array of matrices (instead of individual translation, normal, tangent), which can feed directly into other matrix constraints without using Compose Matrix or feeding into local channel transforms.
Also, a new attribute has been added to these nodes called Normal Override, that gives you the option to set it to Rail, which, when connected to Rail Curve geometry, lets you compute normals. See UV Pin options and Proximity pin options.
Game vertex count
A new gameVertexCount plug-in allows you to display real-time Game Vertex Counts for Unreal or Unity. This lets you see how many vertices each engine will evaluate once the object is exported, so you can estimate your in-game vertex count budget.
Updated Substance plug-in
Maya 2022 includes the Substance 2.1.9 plug-in.
For a list of features, visit http://www.autodesk.com/maya-substance-docs.