With the release of Autodesk BIM 360 Design, project teams now have greater flexibility in how they allow their model to be consumed by others using Revit Cloud Worksharing. There are several methods available to use when linking:
Method 1 - Controlled Sharing - ‘Consume’ Published Models from Packages
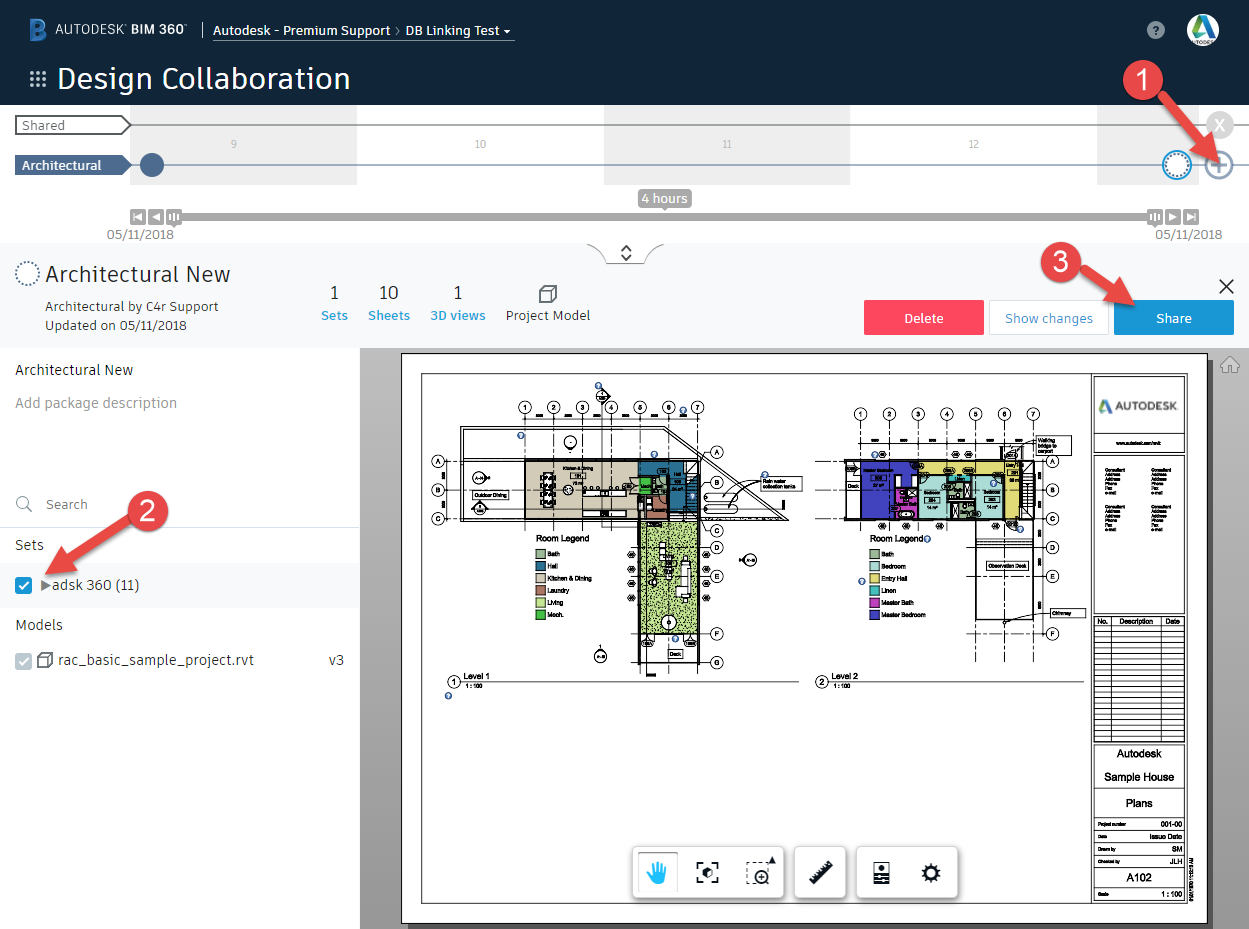
Using this workflow, the model author will first Publish their model - they can do this from Revit’s Publish function or from the 'Update to Latest' button in Design Collaboration. To make their published model shareable, they must first click "+" to create a new Package, then curate which 'Sets' (collections of views and sheets) they want included in the Package with the model. Finally, they must Share the package.
Once the author has shared the package, you may then Consume it. Consuming a package means that you’ve brought another team’s package into your environment and it is available for linking to.
Before consuming:
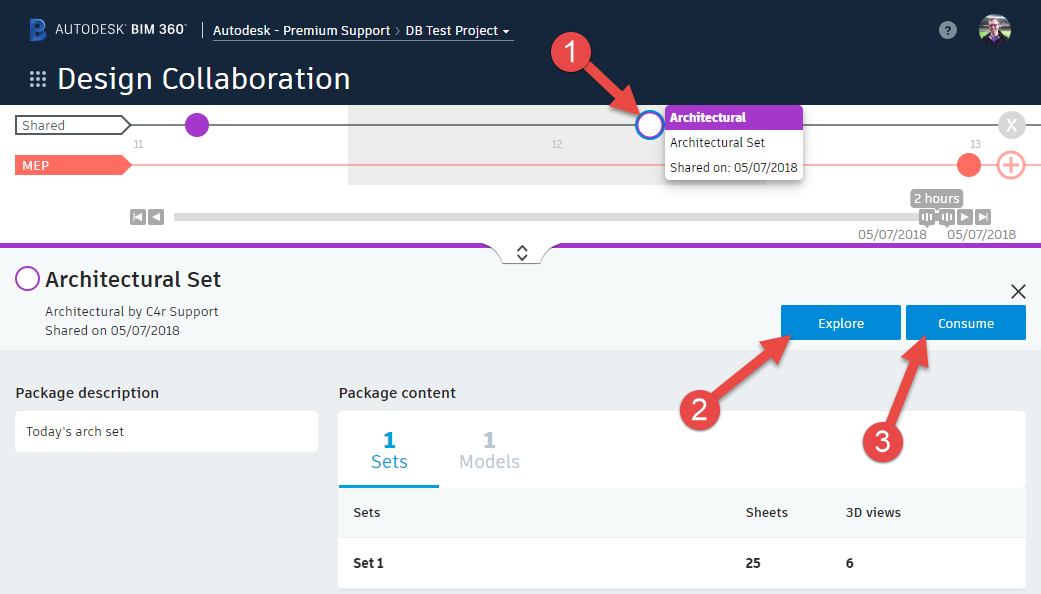
In the image below, a member of the MEP team is consuming a package published by the Architecture team (designated by the white circle).
It's useful to preview and ‘Explore’ a Package before choosing to consume it as your link. Exploring the package details will reveal the newly released items in a full model or sheet viewer, and will allow you to review changes made in the model since the last package was published by that team.
To link to models that are published in Packages, you make it available for linking by ‘consuming’ the package. To consume a package, click on the circle to select the it, then click the Consume button.
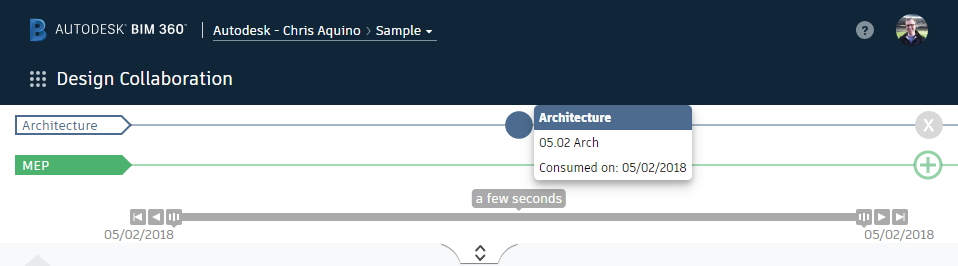
After consuming:
In the Design Collaboration module, the package timeline dot will appear filled with color.
In the Document Management module, the model gets added to the ‘Consumed’ folder in Document Management, under the appropriate ‘team’ folder.
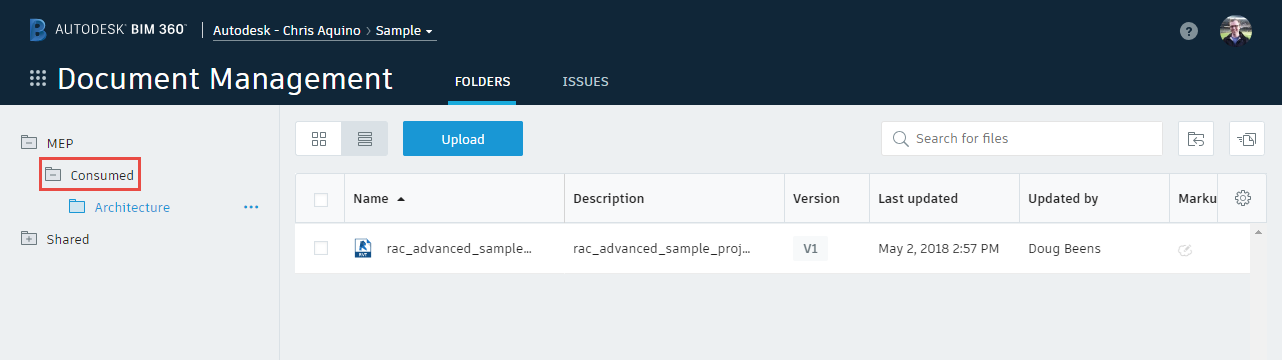
In Revit, when adding a link, you’ll simply navigate to your team’s Consumed folder in Document Management (BIM 360://Project Name/Project Files/Your Team Name/Consumed/Team Name/FileName.rvt).
Method 2 - Controlled Sharing - Link from the Shared Folder
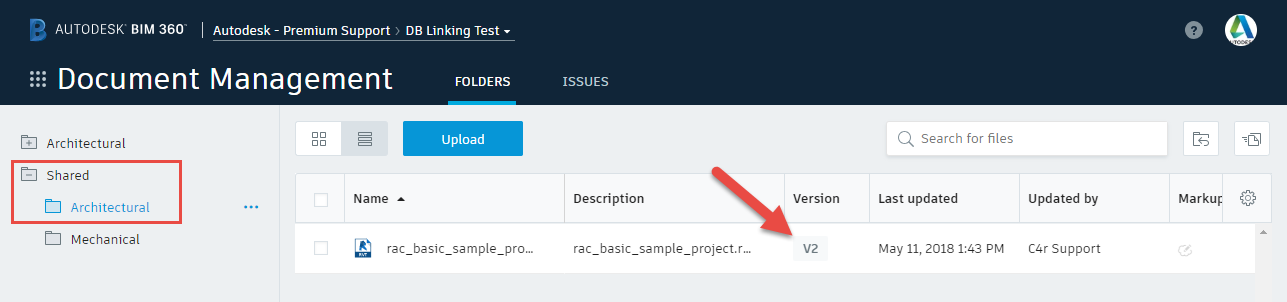
When the model author shares a package in Design Collaboration, a copy of the model will automatically be created (or updated to a new version: see image below) in the 'Shared' folder for their team in Document Management. If your team wants to automatically have these newly-shared models linked in, it is possible to link directly to the 'Shared' folder location.
In Revit, when adding a link, you’ll simply navigate to the other team’s Shared model in their Document Management ‘Shared’ folder (BIM 360://Project Name/Project Files/Shared/Team Name/FileName.rvt).
Method 3 - Live Linking
"Live linking" is the workflow that most users will be used to if they’ve used Revit Cloud Worksharing prior to the release of BIM 360 Design. What this means is that you are linking directly to another team's model where they're actively making changes - the model "live", not static.
Live linking to a model is possible if the users consuming the model are added to the Team associated with that model. To use this workflow, users must have ‘View + Download’ permissions in the Team, at minimum. You can share your Team’s model with individual users, people in specific Roles, or with Companies.
As an example: if you’re an architectural office and you want the engineering teams to have access to your live model, you could add their whole Company, or add any project members with the Role of Engineer.

In Revit, when adding a link, you’ll simply navigate to the other team’s live model in their Document Management root folder (BIM 360://Project Name/Project Files/Team Name/FileName.rvt).
Any users, roles, or companies added to your Team with ‘View + Download’ access (at minimum) will be able to live-link to your model in Revit.
Recommended Reading:


