Check Building
There are three pages that support the creation of new checks, Advanced Check Builder, Wizard Check Builder, and Pre-Built Checks. Checks created in any of these pages can be added and organized into the checkset on Check Structure and Organization and previewed on Preview Checkset.
Advanced Check Builder
This allows you full control over every aspect of your checks. This is recommended for those who have created checks before, or if you need to modify an existing check. When editing a check, even if created with the wizard, they will open in this interface.
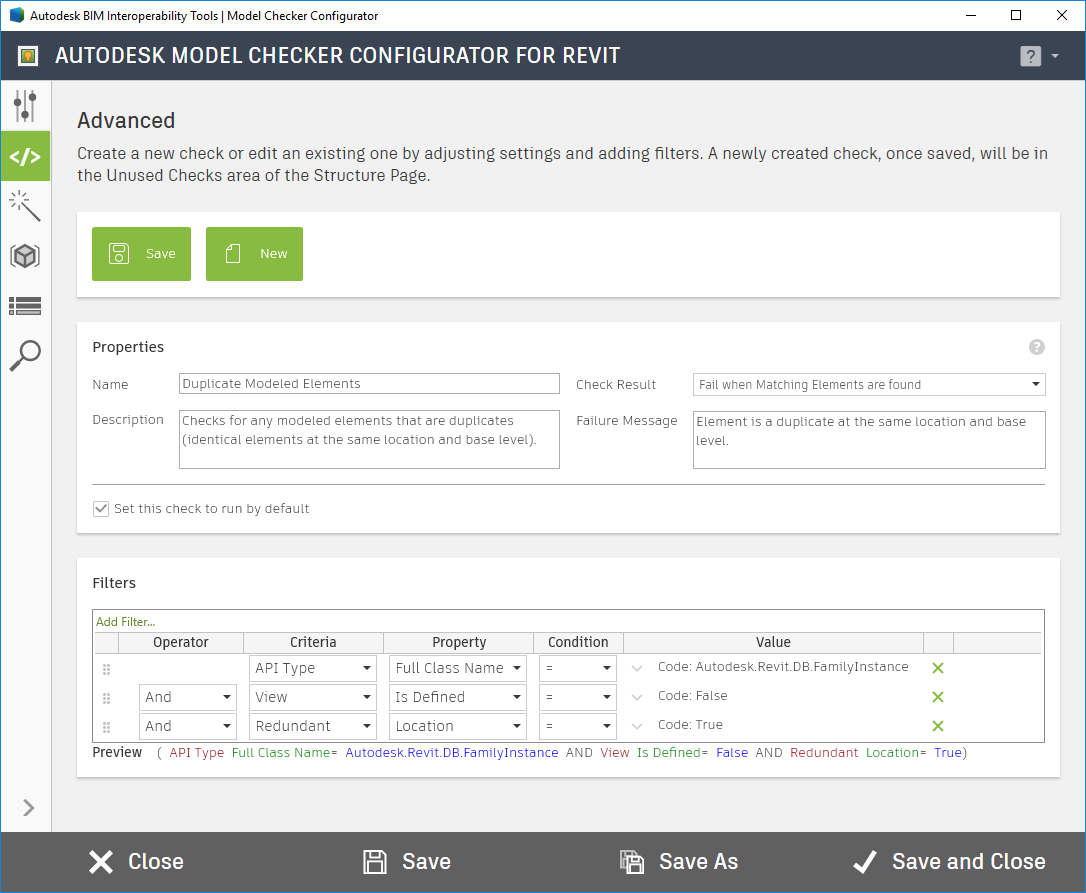
Save: This saves any changes made to the current check. This does not save the checkset file.
New: This allow you to create a new check.
Name: This is where the name of the check is specified and will be displayed to the user in dialog titles, summaries, and reports in the Model Checke.
Check Result: Select from the drop down the purpose of the check. There are four options:
- Fail when no matching elements are found will report a fail when no elements are found matching the check filters.
- Fail when matching elements are found will report a fail, provide a count of the number of elements that failed, and generate a list of any elements that match the check filters.
- Count will provide a count of the number of elements that match the check filters.
- Count and List will provide a count of all the elements, and also generate a list of all elements that match the check filters.
Description: This allows for an explanation of the check and will be displayed to the user in dialog titles, summaries, and reports in the Model Checker.
Fail Message: This is the message to the users that will be displayed when the the check fails. This will be displayed to the user in dialog titles, summaries, and reports in the Model Checker. This field is only provided when Check Result is set to either Fail when no matching elements are found or Fail when matching elements are found.
Filters: This allows for the creation of individual filters in the check. To reorder filters, simply drag and drop the six gray dots to the left of the filter row. Build individual filters by setting the correct, Operator, Criteria, Property, Condition, and Value.
Operator: And will add more filter criteria to the check. Exclude will remove a group of filter criteria from the check. Or will establish a new group of filter criteria for the check, independent of the prior filter groups. The Configurator will graphically indent filter groups to make it easier to recognize them.
User Defined Fields: By expanding the 'Value' expander for a filter, you can make a field user defined. Filters with user defined values will be presented to the user as fields and the user will be allowed to input their own values and/or save different configurations with different values.
Units: Expanding the 'Value' expander will give you access to the Units dialog boxes. There you can enter a value, select a unit type, and select a unit. Switching units will convert the value from the old unit to the new one.
Wizard Check Builder
The Wizard will prompt you with a series of simple questions that will guide you through the creation of a check, with the appropriate configuration and filters.
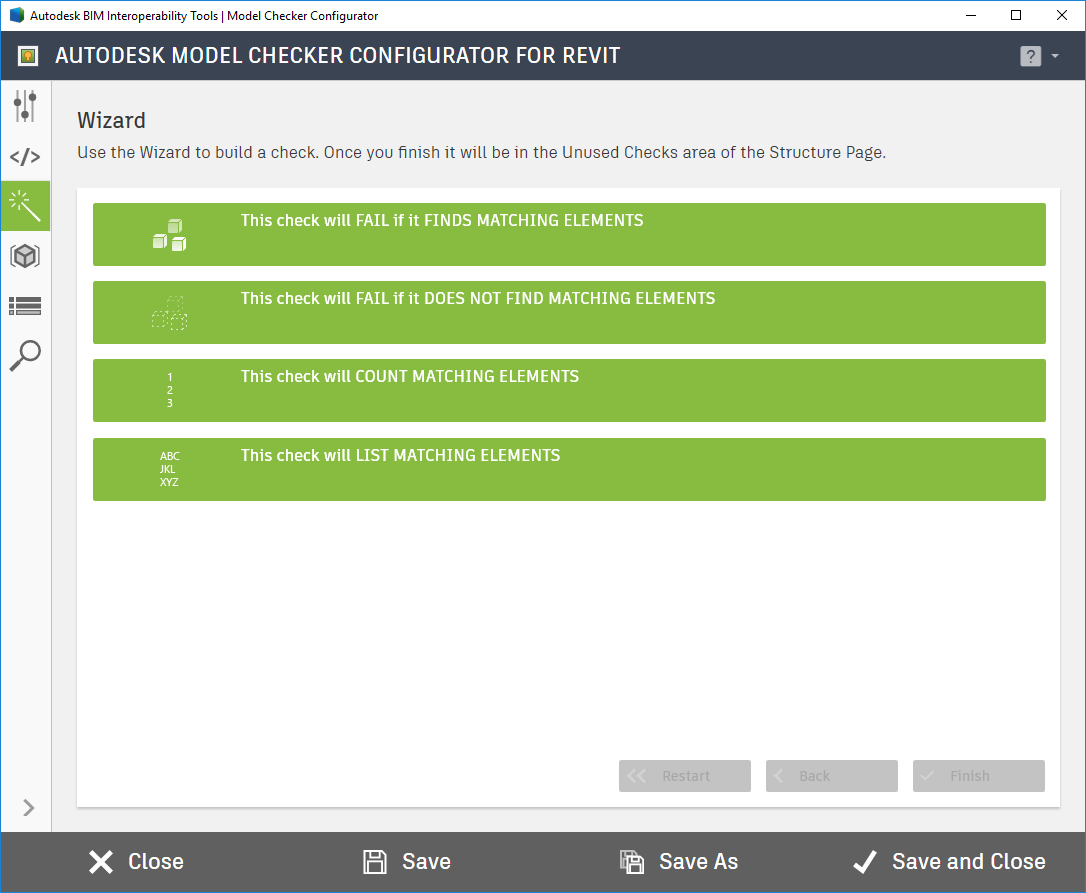
Using the Wizard: The Wizard has a simple consistent interface, allowing you to go back through the creation process, or even start over from the beginning if necessary. The first question is how do you want the check to operate, see Check Result above for a description of each of these. Depending on your selection, you will be given a series of other questions. When the Wizard has enough information from you, you will be asked if you want to finish and name your check, or continue adding to it. Adding a filter, will continue to refine the criteria you have already created. Adding another filter group will create a separate collection of filters that is collected under the same check as before, but has its own criteria.
Once the check is complete and you finish, you can not return to the Wizard. All follow-up work and changes must be done through the Advanced Check Builder page.
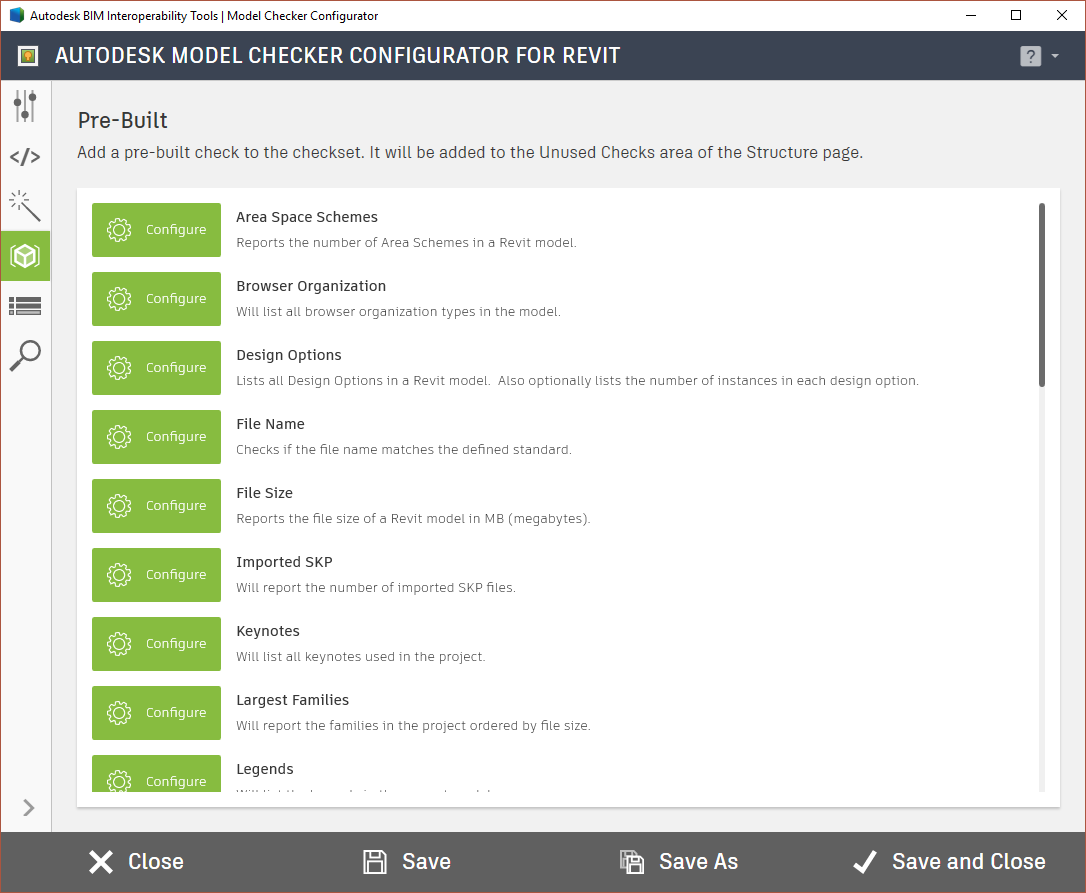
Pre-built Checks
This page contains pre-built checks that cannot be created via the Advanced Check Builder or the Wizard check builder. Next to each check is an “Add” button, this will let you modify some of the information about the check prior to adding it to the Unused checks.
Check Structure and Organization
This page allows for organizing the checks into different headers and sections and subsections.
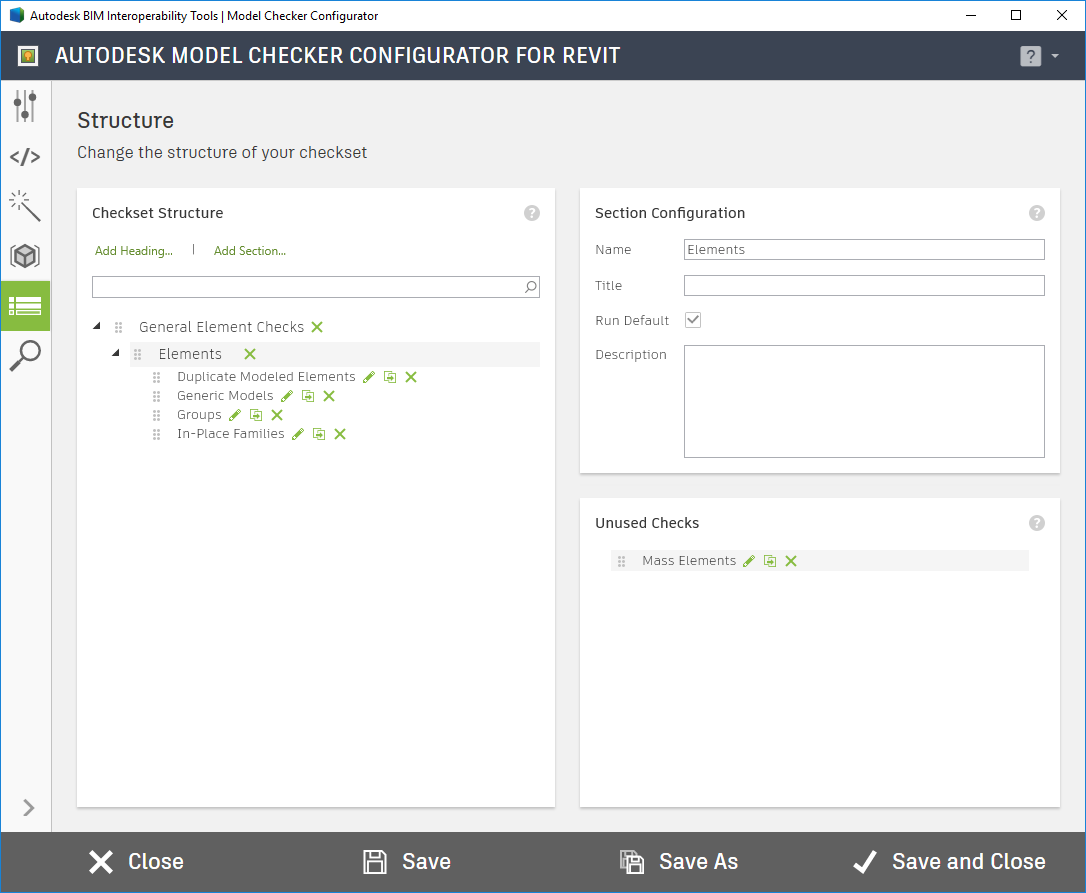
Add Heading: This creates a new heading of the check. Headings are only for the top level of any checkset. This will help organize your checks and the exported reports of the check results.
Headings comprise of 3 fields, Title, Default Run and Description. The title and description fields will be displayed to the user in dialog titles, summaries, and reports in the Model Checker when this configuration is used. The description field is optional. The Title and Run Default fields are required.
Add Section: This will create a new section below the selected heading or section. Section which can be added below headings or sections.
Sections comprise of 4 fields, Name, Title, Default Run and Description. The name, title and description fields will be displayed to the user in dialog titles, summaries, and reports in the Model Checker when this configuration is used. The title and description field are optional. The name and Run Default fields are required.
Unused Checks: All checks created first appear in this panel. They can then be dragged to the appropriate section.
Check Options: Next to each check there are 3 icons, see image below.
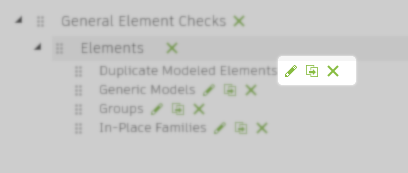
- Pencil: This allows you to edit a check and will open the check in the Advanced Check Builder page.
- Duplicate: This will duplicate the current check and place it in the same section.
- X: This allows for the deletion of the current check. If the check is added to a section this will remove the check from the section and place it in the unused check panel.
For more information, sample files, and downloads, visit the Model Checker Configurator page on the Autodesk BIM Interoperability Tools website.


