What
Revit offers many way to create nonstandard walls that are slanted or even completely deformed. This article gives some examples of various possibilities to create any wall you can think of in Revit.
Who
Architects, Engineers who need to model deformed historic walls or design other nonstandard walls.
How
There are many ways to create nonstandard walls. This article shows you three of them. You can add a slanted profile to a wall, create an in-place family whose type is wall, and place walls on an in-place mass.
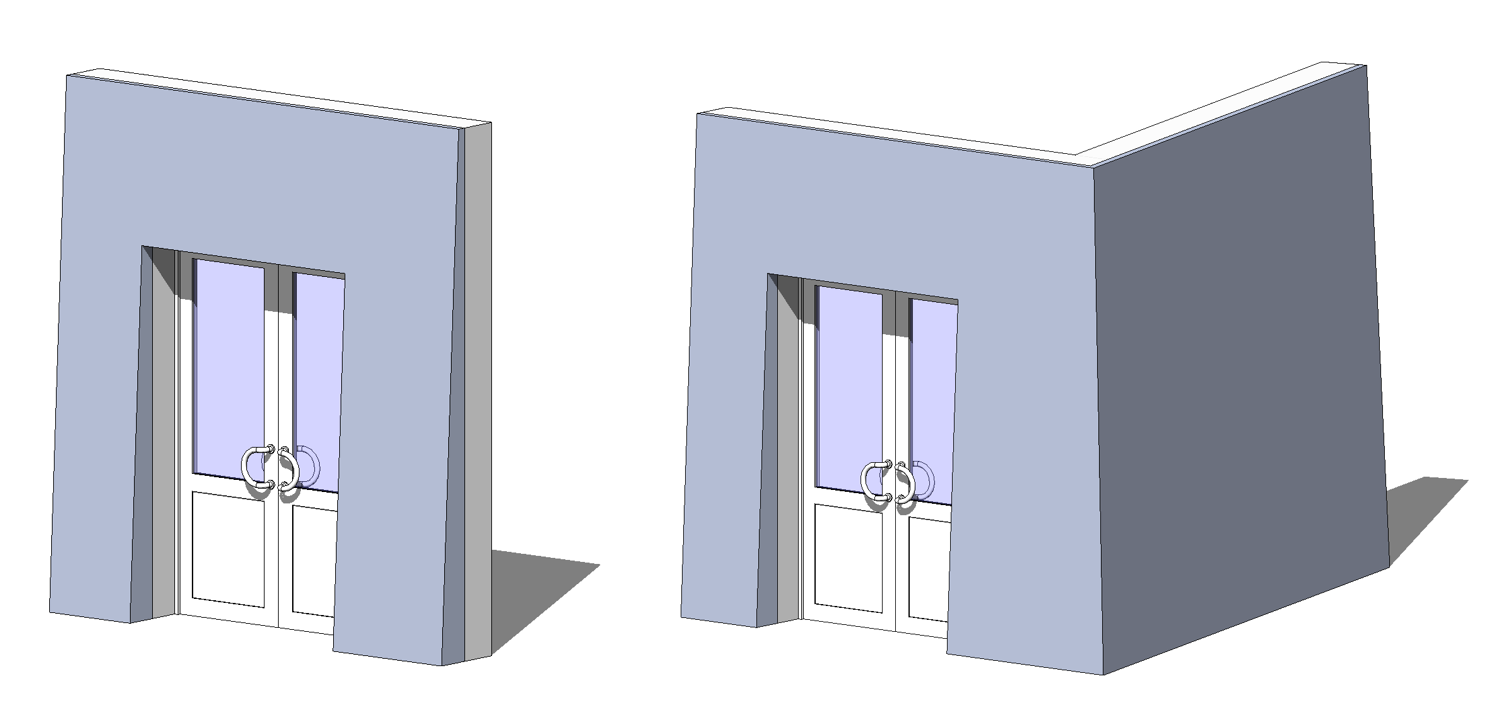
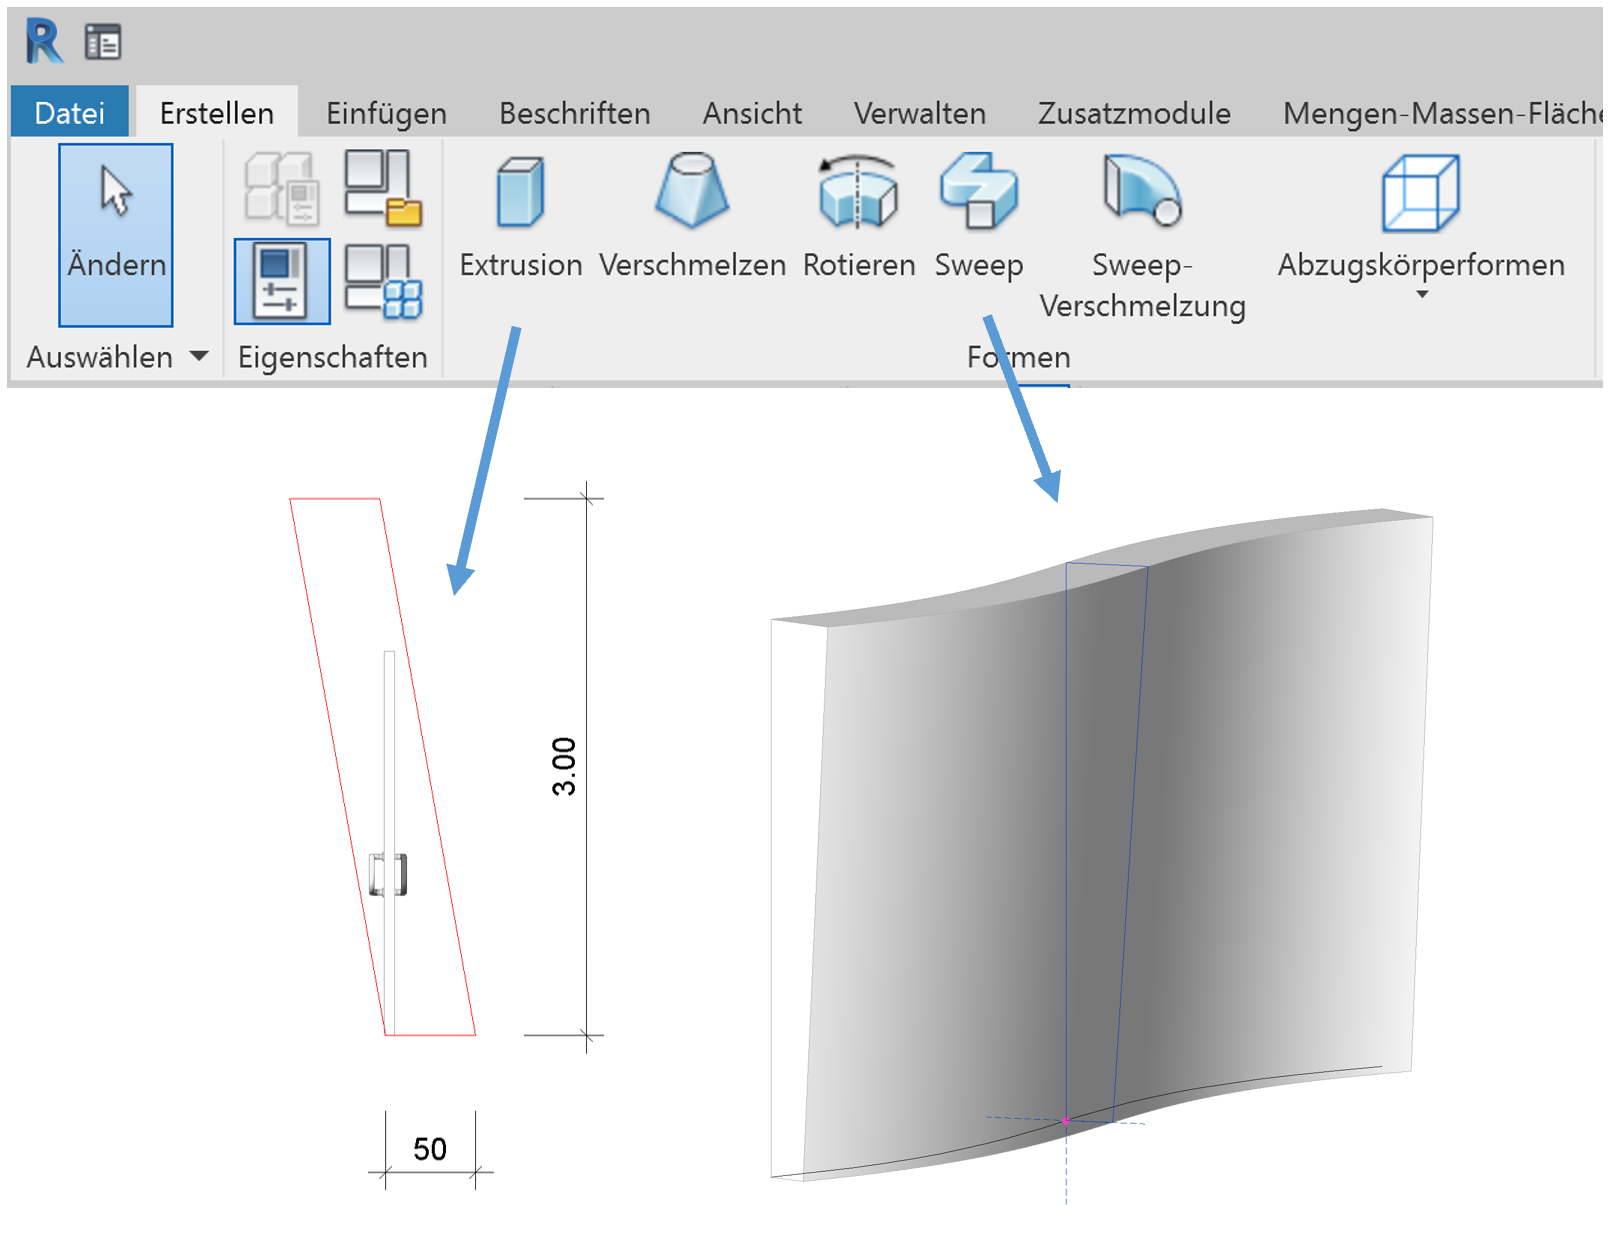
Add a 2D slanted profile to a standard wall
This method lets you continue working with Revit standard walls, including walls with multiple layers, while one type has a slanted wall. The slanted wall can even run around corners.
The disadvantage of this method is that you need different profiles with defined heights for different angles. The angle or inclination needs to be the same throughout a wall.
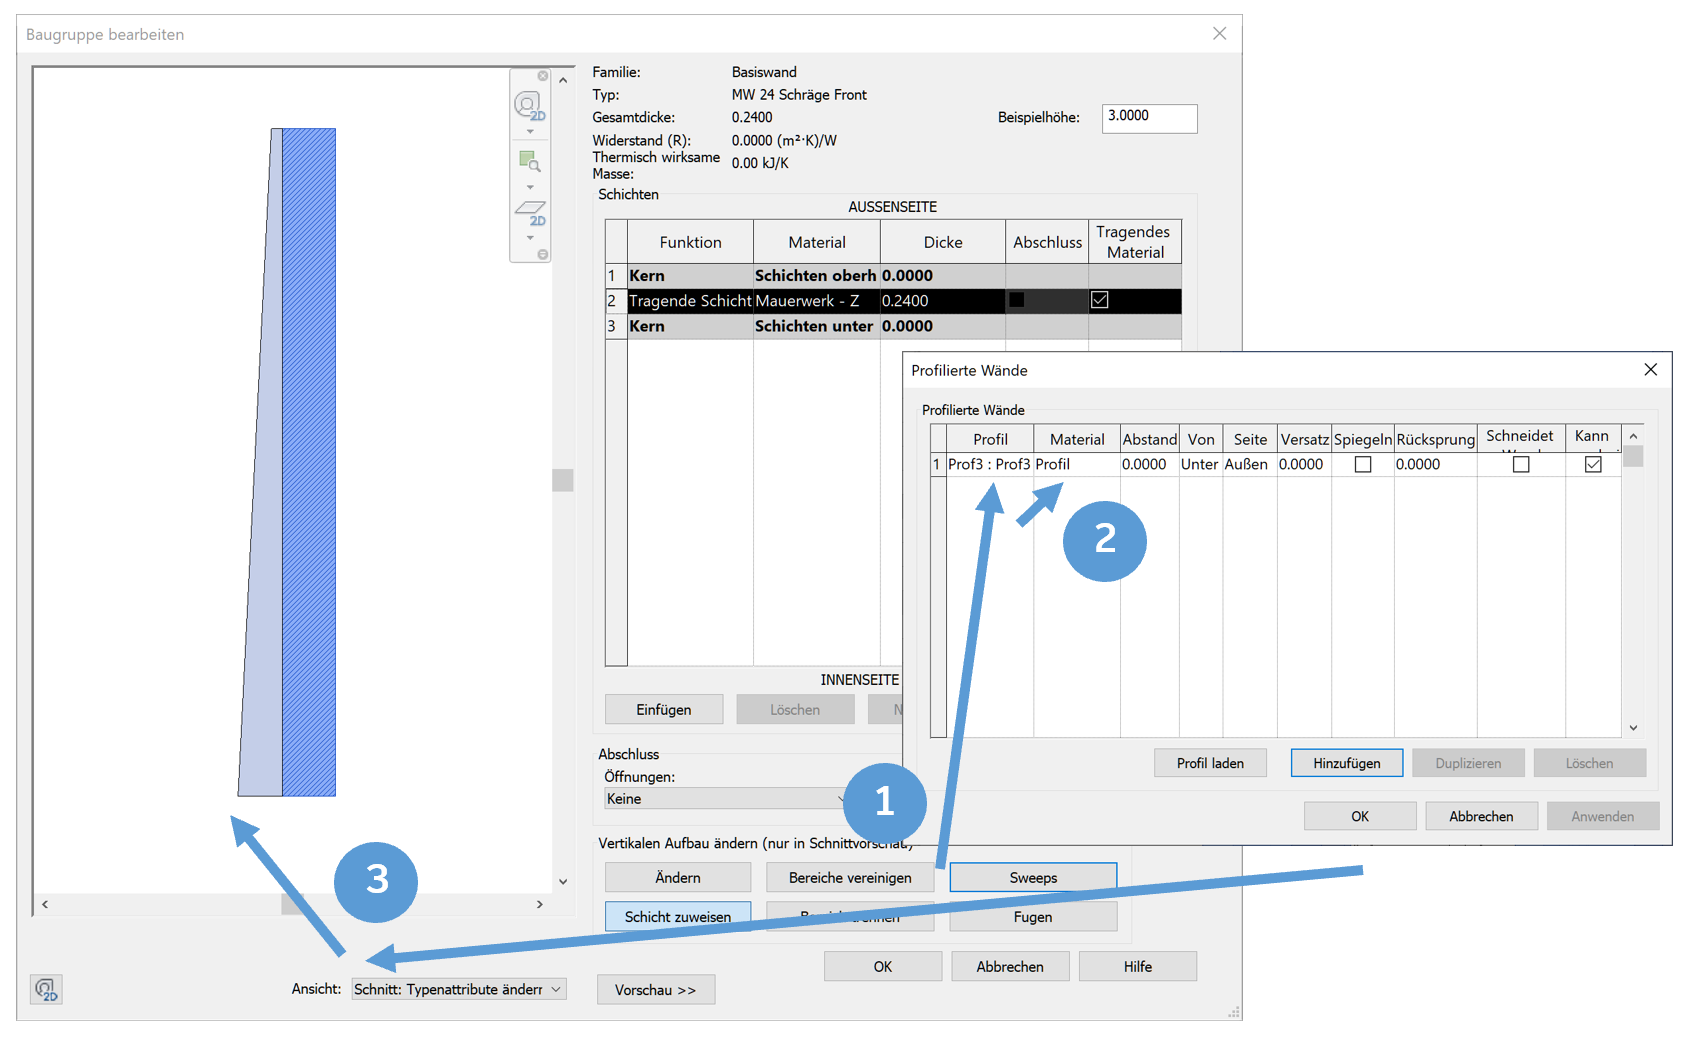
1. Edit the construction of a wall, and add a 2D profile as sweep.
2. If desired, define the material.
3. To preview the result, switch to Section view.
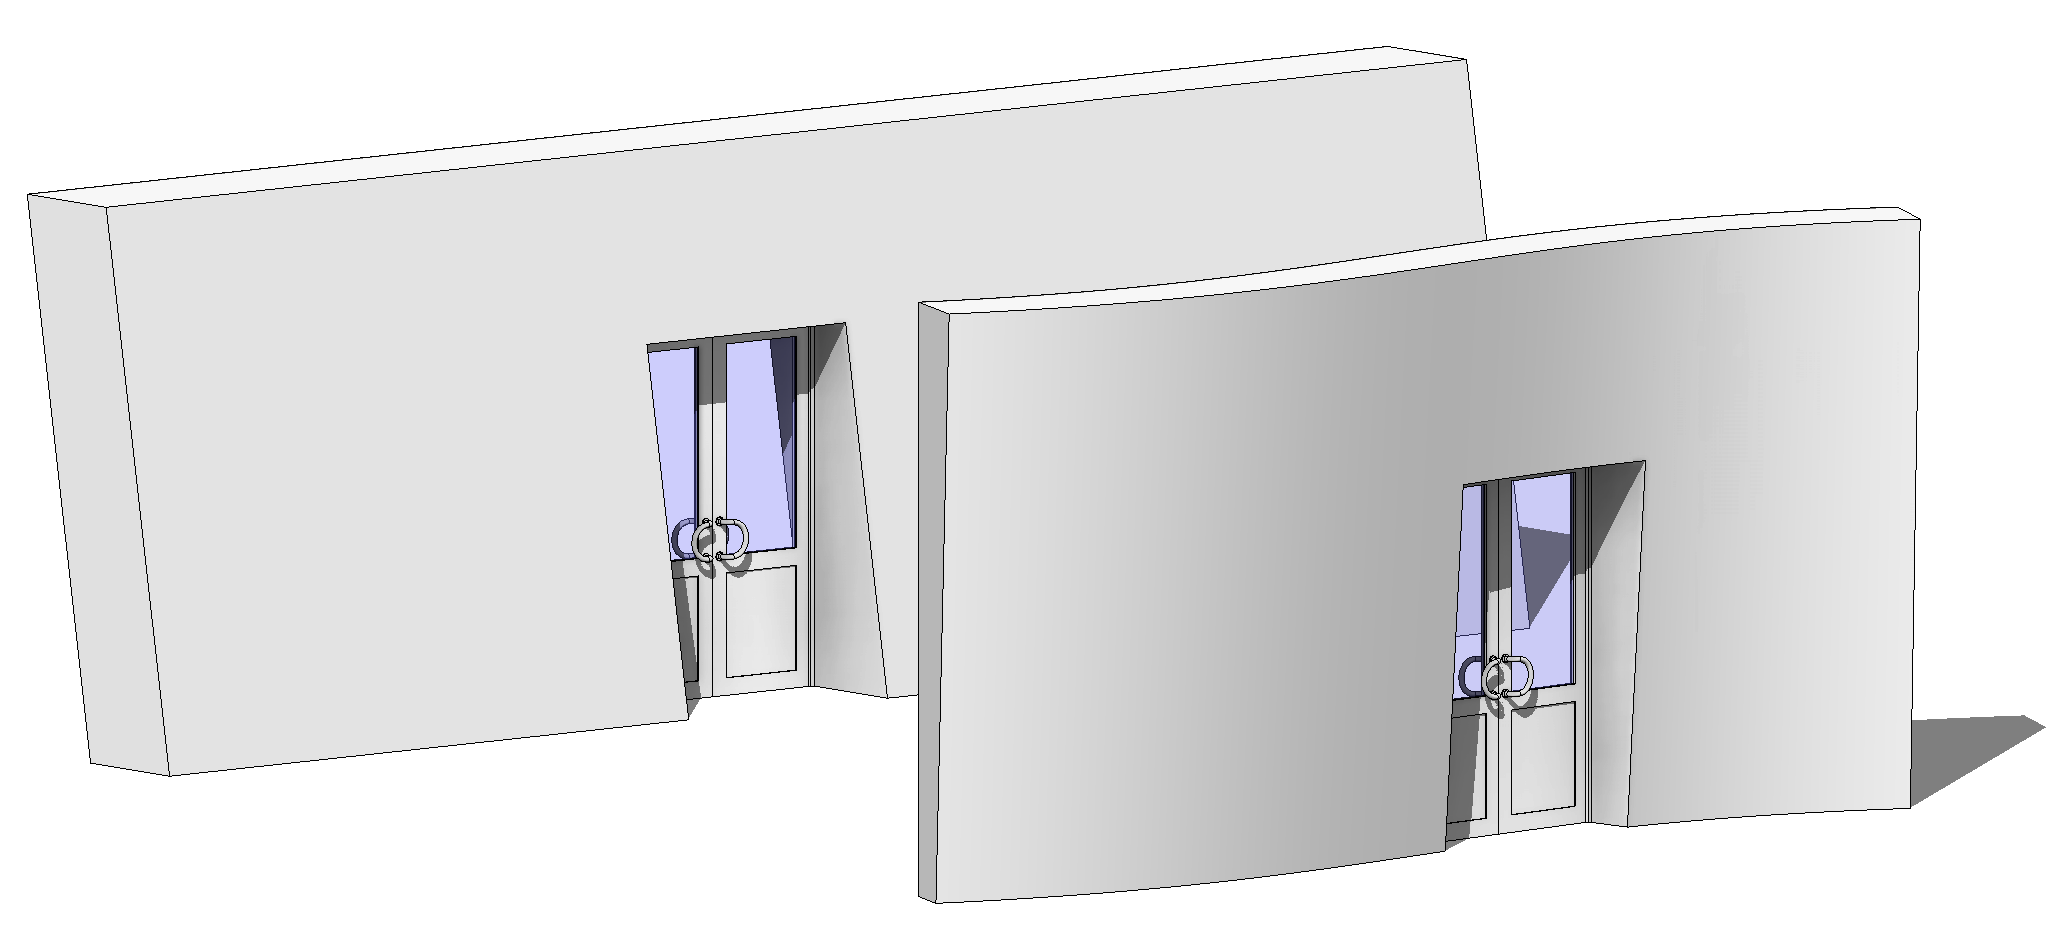
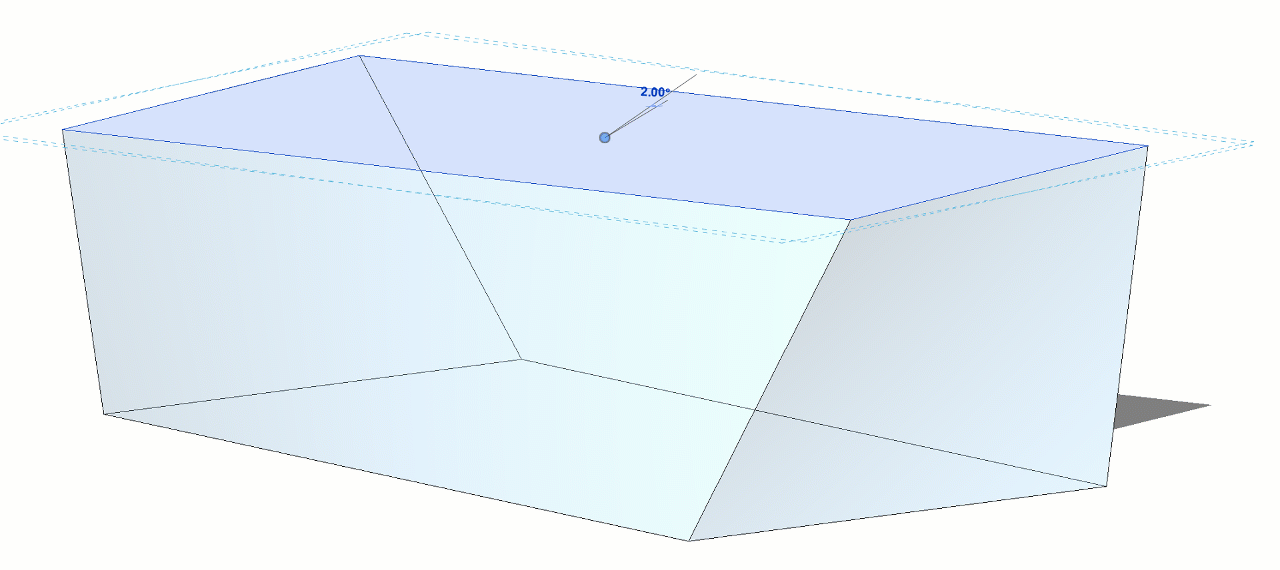
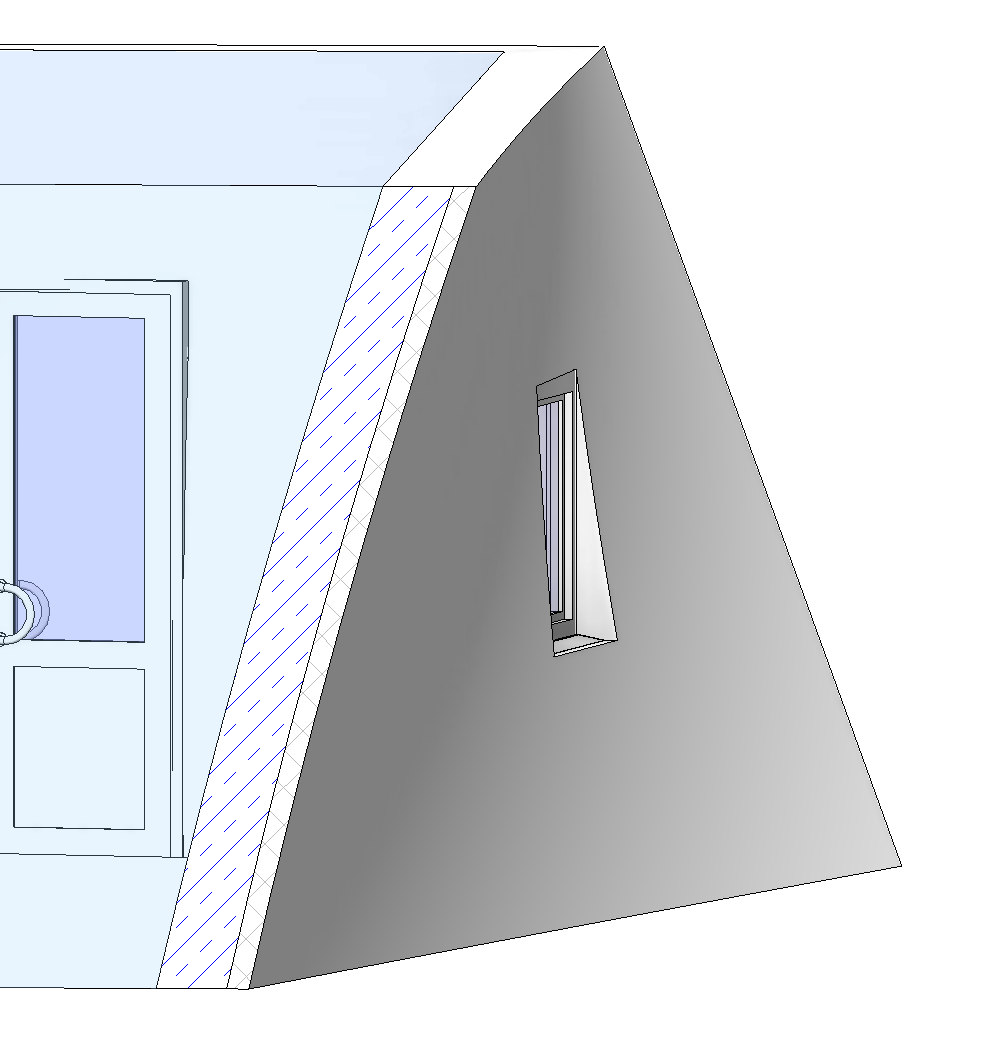
Freely model the wall from an inplace family whose type is wall
This method lets you use an extrusion, rotation, loft, or sweep to create a nonstandard wall, and then cut the wall with doors or windows.
The disadvantage of this method is that you need to create the wall layers separately. Also, you can’t use standard wall functionality.
1. Create an in-place family and select Wall as family type.
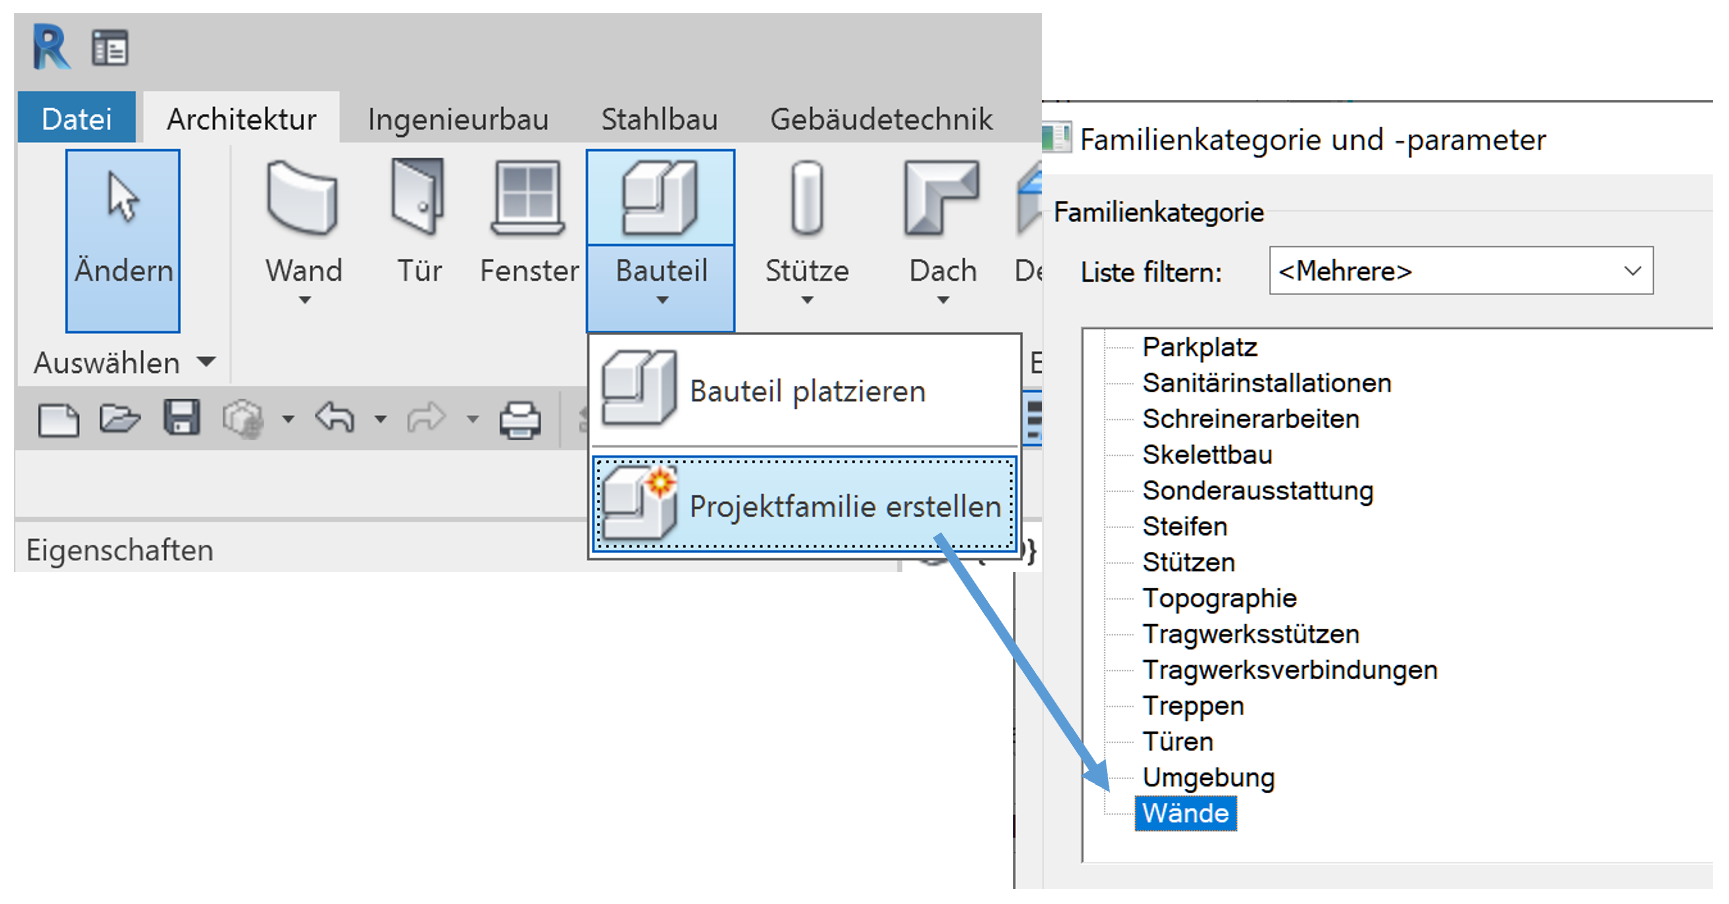
2. Use the different modeling functionalities to create the desired wall form.
Create an in-place mass and place standard walls on the relevant faces
This method lets you create any form, and then adjust it to an existing wall or other building object. You can use standard or multilayered walls to create the wall you want.
The disadvantage is that the walls depend on mass elements. So, to change a wall, you must first change the mass object.
1. Create an in-place mass.
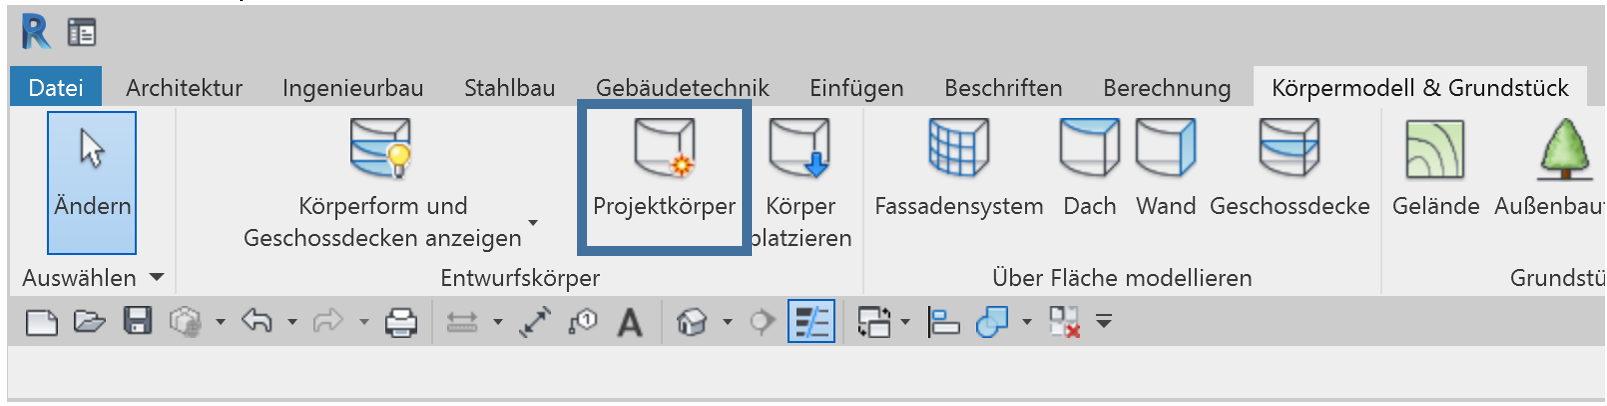
2. Use flexible modifications to edit the mass. Use the Wall By Face tool to place the desired wall on the faces.
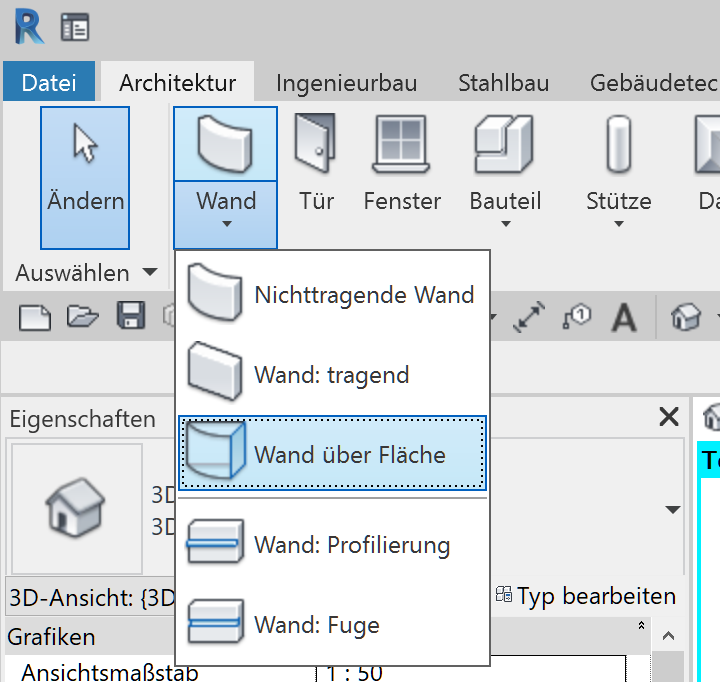
3. Now you can insert doors and windows into these walls. When you do, even sections show the correct section cut.
Why
Because objects in a project may have nonstandard size or form, you need a way to model them. As in these examples with deformed walls, Revit offers many ways to create nonstandard objects.
What next?
To create even more complex geometry, use adaptive components in Revit or Dynamo.


