Need help? Ask the Autodesk Assistant!
The Assistant can help you find answers or contact an agent.
What level of support do you have?
Different subscription plans provide distinct categories of support. Find out the level of support for your plan.
Autodesk Support
May 18, 2022
[This page has been updated to work with Revit 2025. If you are interested in previous versions, i.e., Revit 2023&2024, you can download the pdf version of the training materials from here ]
Throughout the next few lessons, you will be extending the original code to include additional features and to improve robustness. In this lesson, you will improve your selection functionality, by making it easier for the user to select a group and make sure your plug-in anticipates the possibility of something unexpected happening.
Planning out the New Functionality
When you launch the external command defined by the plug-in you created in Lesson 1, the status bar in Revit shows the prompt string, "Please select a group". With the current implementation there are two scenarios that could prove problematic for your plug-in: first, the user may select a non-group element. Second, the user may click or press a wrong button or key during the input process. Neither of these possibilities have currently been anticipated by your original code. You will now add code to your plug-in to check for these error conditions and deal with them gracefully. First, let’s see what happens in these two situations and how best to deal with them:
While selecting a group, the user’s cursor hovers over Room 1. In this case, the room, its bounding walls and the group itself could potentially each be highlighted and selected. However, your command expects the selected item to be a group. If the room or one of its bounding walls is selected, an error dialog, shown below, will be displayed before your command fails.
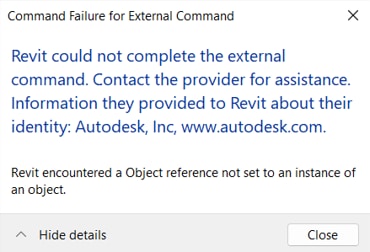
To avoid incorrectly selecting an element other than a group while using your command, the user would have to move the cursor very carefully until the group is highlighted and then click to select it. The command should manage this situation more cleanly: while the message presented to the user gives information about the problem in the code, this is not at all helpful for the user of the plug-in.
Plug-in Solution
To reduce the chances of the user incorrectly selecting a non-group element, you will add a selection filter. A selection filter limits the types of object being selected during the user interaction. When you ask the user to select a group, only groups will be highlighted when hovered over in the Revit user interface. This will help guide users to select a group, even if they haven’t seen the prompt displayed on the status bar.
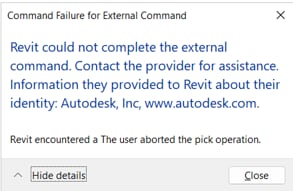
While selecting a group or picking a point, it’s possible for users to click any mouse button or hit any key on the keyboard. This is currently a problem for your plug-in, as both PickObject() and PickPoint() only expect the user to left-click the mouse during selection. If the user right-clicks the mouse, or hits the “Esc” key to cancel this command, this following error message will be displayed:
Plug-in Solution
To prevent this error message from being displayed, you will add code to catch the exception and handle it. If the exception is caused by the user right-clicking or hitting the “Esc” key, you will simply terminate the current command. For other exceptions, you will present the error message to the user via the standard Revit error dialog.
Although the above should be enough to prevent these particular errors from being generated, you will also add an exception handling mechanism to deal with other possible errors.
Coding the New Functionality
You’ll start by adding your selection filter to highlight groups during the PickObject() call. You’ll then add an exception handler to avoid the obscure error message, should the user still select something other than a group.
Type the following code fragment after the class Class1 definition code, feel free to check the complete code to ensure your location is correct.
// Filter to constrain picking to model groups. Only model groups
// are highlighted and can be selected when cursor is hovering.
public class GroupPickFilter : ISelectionFilter
{
     public bool AllowElement(Element elem)
     {
          if(elem.Category?.Id?.Value == (int)BuiltInCategory.OST_IOSModelGroups)
            {
                return true;
            }
            else
            {
               return false;
            }
     }
     public bool AllowReference(Reference reference, XYZ position)
     {
         return false;
     }
}
In the code window, replace this line:
pickedref = sel.PickObject(ObjectType.Element,"Please select a group"); With the following two lines:
             GroupPickFilter selFilter = new GroupPickFilter();
             pickedref = sel.PickObject(ObjectType.Element,selFilter,"Please select a group");
We’ll come back to the explanation of the code later.
Enter the following code in the Execute() method of the class Class1 after the line that gets the document object and before the line asking the user to pick a group.
            try
              {
                //…Move most of code in Execute method to here.
              }

            //If the user right-clicks or presses Esc, handle the exception
            catch (Autodesk.Revit.Exceptions.OperationCanceledException)
                {
                  return Result.Cancelled;
                }
            catch (Exception ex)
                {
                  message = ex.Message;
                  return Result.Failed;
                }
Then move the following block of code to be enclosed by the try’s two braces.
           //Define a reference Object to accept the pick result
            Reference pickedref;

          //Pick a group
             Selection sel = uiapp.ActiveUIDocument.Selection;
             GroupPickFilter selFilter = new GroupPickFilter();
             pickedref = sel.PickObject(ObjectType.Element, selFilter, "Please select a group");
             Element elem = doc.GetElement(pickedref);
             Group? group = elem as Group;

          //Pick point
             XYZ point = sel.PickPoint("Please pick a point to place group");

          //Place the group
             Transaction trans = new Transaction(doc);
             trans.Start("Lab");
             doc.Create.PlaceGroup(point, group?.GroupType);
             trans.Commit();
All exceptions that might occur during execution of the above code will be caught and handled gracefully by this exception handling mechanism.
After the above two steps, you have completed your code for this lesson. The complete code for this lesson is also provided for download at the top of this lesson. It can be useful to see the complete code to compare your results and ensure they are correct.
On the File menu, click Save All.
Note: If Revit 20xx is already running, please close it.
Inside Visual Studio, in the Build menu, click Build Solution to compile and build your plug-in. If the code builds successfully, you will see the Build succeeded message in the status bar of Visual Studio.
Running the Plug-in
A Closer Look at the Code
Object Selection
You called the PickObject() method to prompt the user to select a group. This method has four different forms as shown in the image below.
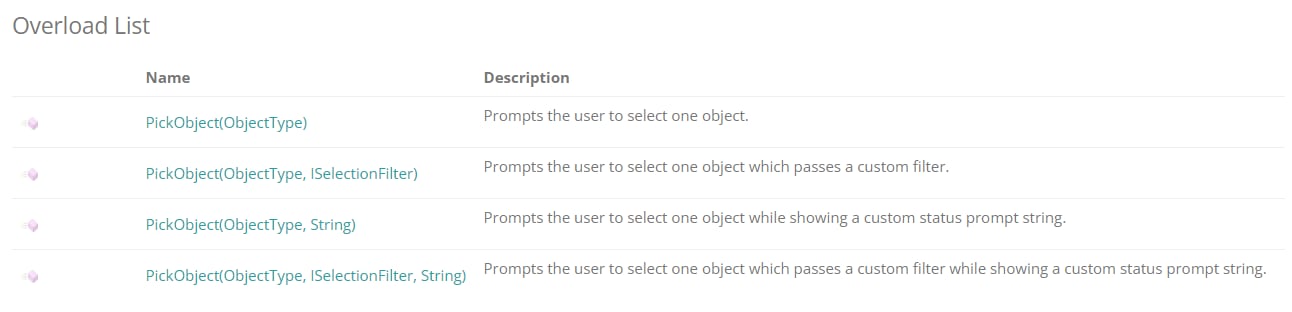
Each form has specific functionality and has a specific parameter signature. The ObjectType argument specifies the type of element that you would like selected – this is common across all four forms.
In Object-Oriented Programming, a method with the same name can take different numbers and types of parameters. This concept is known as overloading. In your original code, you called PickObject() this way:
pickedRef = sel.PickObject(ObjectType.Element, "Please select a group");This corresponds to the third overload in the above list:
public Reference PickObject(ObjectType objectType, string statusPrompt);This overload takes two arguments: an object type and a prompt string. As the argument names indicate, the prompt string will be displayed in the status bar. The user will be allowed to select an element of the specified ObjectType.
In the code you wrote in this lesson, a selection filter is needed to constrain the range of types that can be selected. You did this by using the fourth overload in the list:
public Reference PickObject(ObjectType objectType, ISelectionFilter SelFilter, string statusPrompt);This overload expects you to pass in three arguments: an object type, a selection filter, and a prompt string. The second argument should be an instance of the class that implements the ISelectionFilter interface. We introduced the concept of an interface in Lesson 3, when talking about the IExternalCommand interface. In this lesson you created the GroupPickFilter class which implements the ISelectionFilter interface to tell Revit which elements and references can be selected.
The ISelectionFilter interface has two methods to be implemented: AllowElement() and AllowReference(): you needed to implement both of these in your GroupPickFilter class. The function parameter signatures of AllowElement() and AllowReference() are specified in the Revit API. The signatures of these two methods are shown in the following code.
Here is the skeleton for the new GroupPickFilter class:
          public class GroupPickFilter : ISelectionFilter
                        {
                             public bool AllowElement(Element elem)
                                  {
                                     //insert your code here
                                 }
                           public bool AllowReference(Reference reference, XYZ position)
                                {
                                 //insert your code here
                               }
                       }
During the selection process, when the cursor is hovering over an element, this element will be passed into the AllowElement() method. The AllowElement() method allows you to examine the element and determine whether it should be highlighted or not. If you return true from this method, the element can be highlighted and selected. If you return false, the element can be neither highlighted nor selected.
It’s in the implementation of AllowElement() that you decided whether or not the element should be selectable by checking its category. This is the line of code that checks if the given element’s category type is of “model group”:
elem.Category?.Id?.Value == (int)BuiltInCategory.OST_IOSModelGroupselem.Category?.Id?.Value – gets the category ID from the element elem passed in as a parameter to AllowElement().
Note:
The "?" in "elem.Category?.Id?.Value == (int)BuiltInCategory.OST_IOSModelGroups" acts as a safety check to prevent errors. Known as the null-conditional operator, it verifies if the preceding part (like elem.Category or elem.Category?.Id) is null. If any part is null, the expression safely returns null instead of causing an error. In this context, elem.Category?.Id?.Value first checks if elem has a Category. If it does, it then checks if the Category has an Id. Finally, it retrieves the Id's Value. This mechanism ensures that if any part (Category or Id) is missing, the process halts and returns null, thus preventing an error. For more detailed information, please refer to this link: Null-Conditional Operator in C#
BuiltInCategory.OST_IOSModelGroups – refers to a number identifying the built-in “model group” category, which we retrieve from the BuiltInCategory collection of fixed integer values.
The BuiltInCategory collection is called an enumeration and is declared using the enum keyword in the C# language. An enumeration is a way of associating a human-readable string of characters with an underlying integer: you can think of an enum as a list of integers, each of which has an associated string that can be used instead of the number itself. OST_IOSModelGroups is a particular value in this BuiltInCategory enumeration. In this case it actually refers to the integer value -2000095, although you never really need to know this and it would be bad programming practice to use this number directly in your code.
Since members of an enum are actually integers, BuiltInCategory.OST_IOSModelGroups into an integer to be able to compare it with the category ID value. If the category ID of the element passed into AllowElement() equals the model group’s category ID, then this element is a group and so should be selectable.
As AllowElement() returns a Boolean value (which is either “true” or “false”). During selection, when the cursor hovers over an element, this AllowElement() method is called. If AllowElement() returns true, the element can be highlighted and selected. If it returns false, the element cannot be highlighted or selected. This method checks if the element’s category matches a specific built-in category (OST_IOSModelGroups). If there is a match, it returns true; otherwise, it returns false.
public bool AllowElement(Element elem)
{
   if(elem.Category?.Id?.Value ==(int)BuiltInCategory.OST_IOSModelGroups)
    {
        return true;
    }
    else
    {
        return false;
    }
}
The second method that you needed to implement is AllowReference(). During the selection process, if the cursor is hovering over a reference, this reference will be passed into the AllowReference() method. Once again, if you return true from this method, then the reference can be highlighted and selected. If you return false, the reference can be neither highlighted nor selected. The AllowReference() method also needs to be implemented for the ISelectionFilter to be complete, but as you don’t care about references in your plug-in, you simply return false from it:
public bool AllowReference(Reference reference, XYZ position)
{
   return false;
}
When a program needs to interact with its user but doesn’t anticipate something the user does, it could lead to the program crashing or terminating unexpectedly. .NET Core provides an exception handling mechanism that can “catch” these – and other – errors in execution. You started by placing your code within the braces of a try block. This tells C# that you wanted the CLR (Command Language Runtime) to watch for exceptions (which may be errors or other atypical events) and report them to the subsequent catch block. You can think of the try statement as something that checks for exceptions, and, as soon as it finds one, stops executing the current block of code and throws it outside of itself to be caught below. The catch block for the type of exception that is thrown will handle it: it’s possible to have multiple catch blocks if different behaviours are needed for certain exceptions.
In this lesson, you added two catch blocks. The first is related to the case where the user might hit “Esc” or right-click their mouse during selection of a group or point: this causes an OperationCanceledException exception to be thrown by the PickObject() or PickPoint() method. Using the following catch block, you simply returned Result.Cancelled from your command implementation, as you believe the logical behaviour for the user to see at this point is the command to be cancelled:
//If user right click or press ESC button, handle the exception
catch (Autodesk.Revit.Exceptions.OperationCanceledException)
{
   return Result.Cancelled;
}
There are other exceptions that might occur during execution of your code, such as when you added a new group to the model via the PlaceGroup() method (although the possibility of this failing is very low). Such errors tend to happen for reasons outside of your control, such as the computer being low on memory. To make sure all such possibilities are considered, a second, more general catch block will handle any .NET Core exception. The argument of this catch block is System.Exception (which is shortened to Exception as you are using the System namespace in your code), which is the base class for all exceptions in .NET Core (you could cast any .NET Core exception to this type, should you wish). When this more general catch block executes, you want the command to fail: you place the message contained in your exception (which you access via its Message property) in the message parameter to the Execute() method and then return Result.Failed. This tells Revit the command has failed and causes it to display the exception information in its standard error dialog.
//Catch other error.
catch (Exception ex)
{
   message = ex.Message;
   return Result.Failed;
}
Well done! You have just written a more robust plug-in by improving the selection functionality and anticipating the possibility of something unexpected happening with the use of your plug-in, which will, in turn, improve the user experience. While implementing these new functionalities you discovered more programming concepts: overloading, enumerations and using a try-catch block for error handling.
Was this information helpful?
The Assistant can help you find answers or contact an agent.
What level of support do you have?
Different subscription plans provide distinct categories of support. Find out the level of support for your plan.