Need help? Ask the Autodesk Assistant!
The Assistant can help you find answers or contact an agent.
What level of support do you have?
Different subscription plans provide distinct categories of support. Find out the level of support for your plan.
Autodesk Support
May 18, 2022
My First Plug-in Training
[This page has been updated to work with Revit 2025. If you are interested in previous versions, i.e., Revit 2023&2024, you can download the pdf version of the training materials from here ]
Lesson 1: The Basic Plug-in
|
In this lesson you will create your very first basic Autodesk Revit plug-in for copying groups selected by the user to a specified location.
|
Provide Feedback: Please provide feedback about this Revit Training or this lesson via email: myfirstplugin@autodesk.com Lesson Downloads |
Steps to Create Your First Plug-in
Supported .NET version for Revit version is as follows:
Note: previous versions of Revit 2023 and 2024 uses .NET 4.8. If you are interested in the training materials using previous versions of Revit, you can download the pdf version of the materials from here ],
You can find the developer guide for the versions here:
Revit 2025: https://help.autodesk.com/view/RVT/2025/ENU/?guid=Revit_API_Revit_API_Developers_Guide_html

c. Select "C#" from languages.
d. Choose "All platforms”.
e. Select "Library" as the project type.
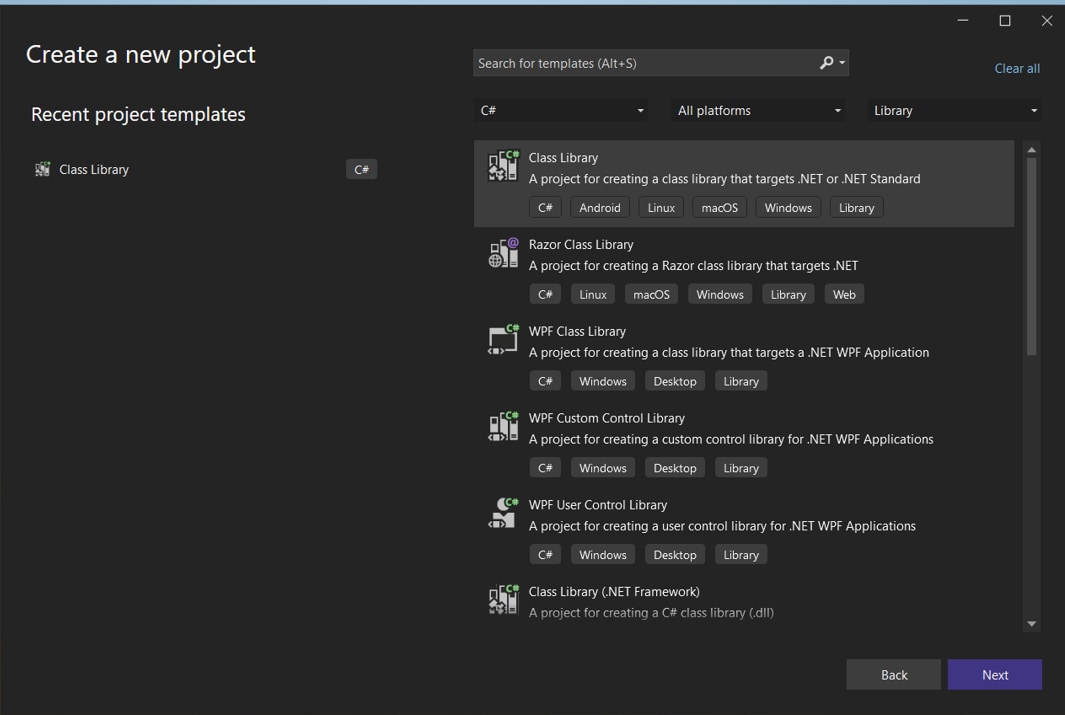
f. Now, choose "Class Library – A project for creating a class library that targets .NET or .NET Standard" from the available options. Click on the "Next" button.
g. Enter "Lab1PlaceGroup" as the Project Name.
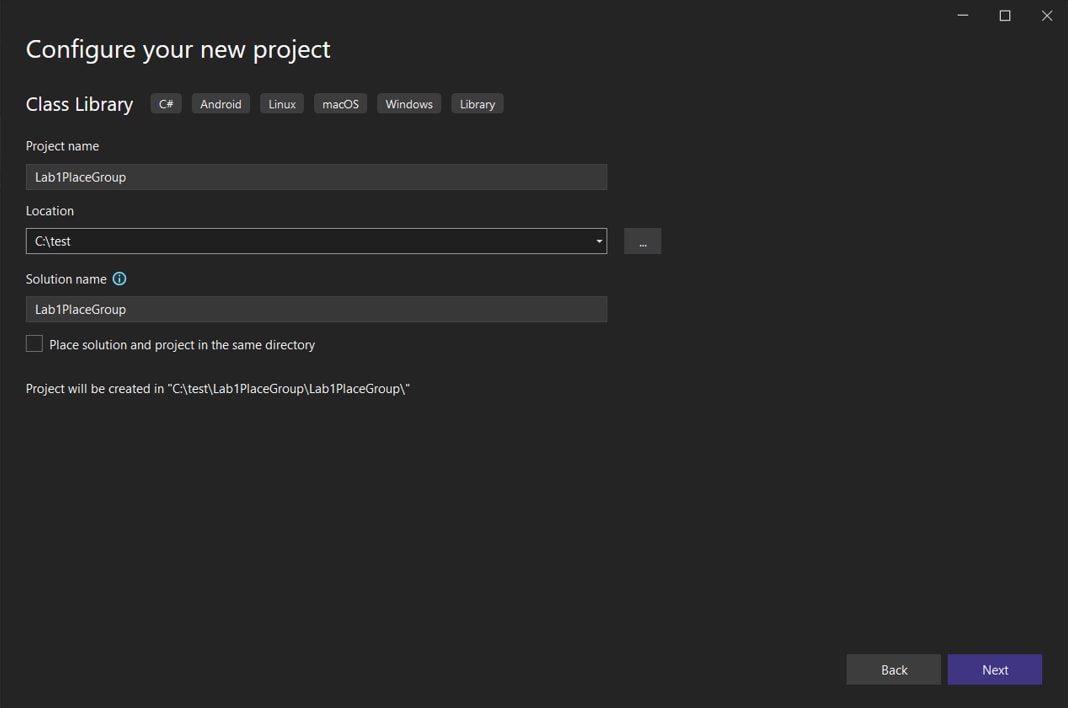
h. Type "C:\test" in the Location box.
i. Click on the "Next" button.
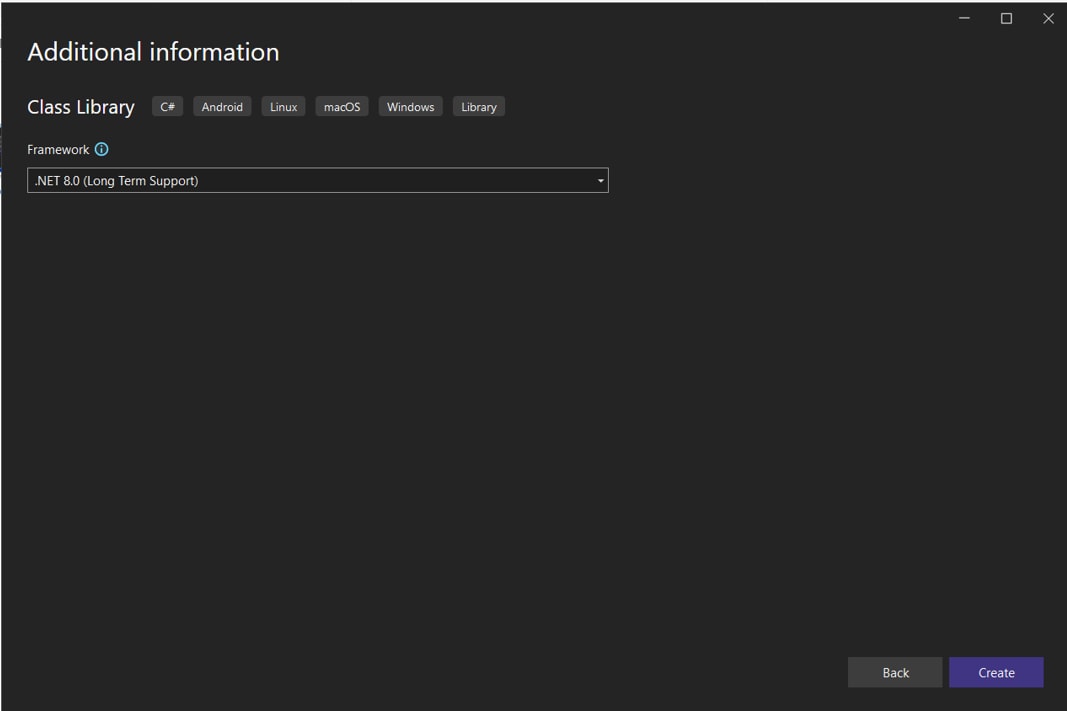
j. In the "Framework" section, choose ".NET 8.0 (Long Term Support)". Finally, click on the "Create" button to create the project.
In the "View" menu, you'll see "Solution Explorer". Click on it. This action should open the Solution Explorer window.
Within the Solution Explorer, right-click "Dependencies" and select "Add Project Reference...".

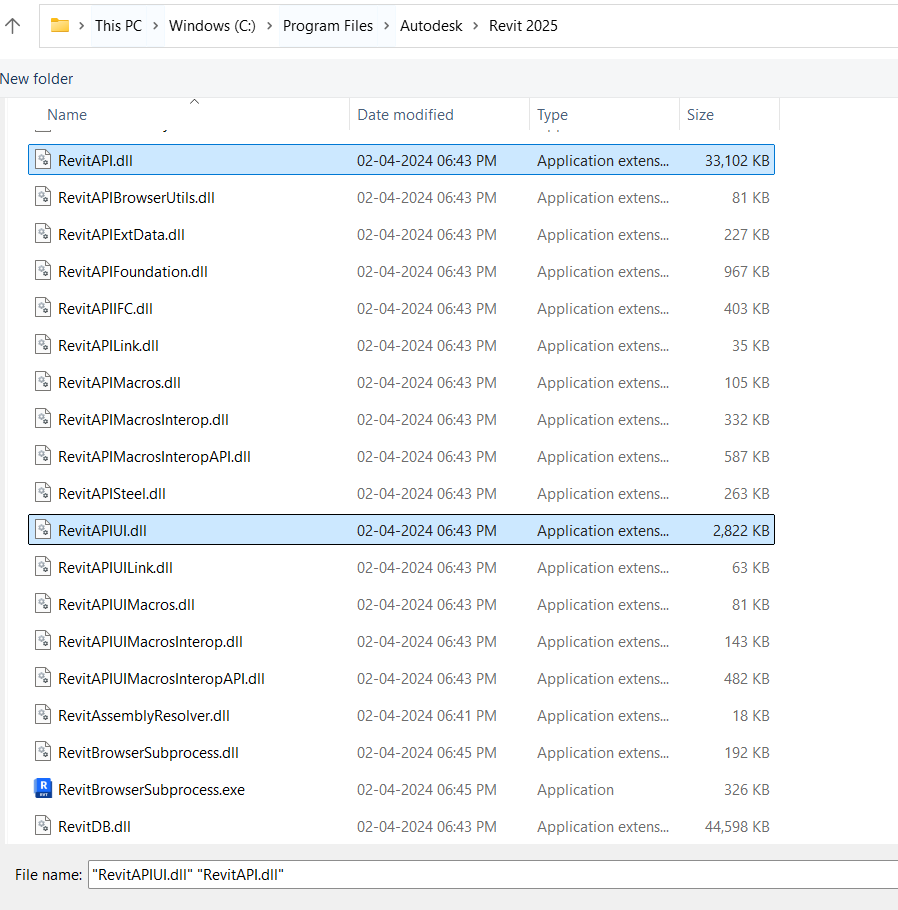
You will add two reference files from this folder. Select RevitAPI.dll, hold the Ctrl key and select RevitAPIUI.dll, and then click OK. Now the two interface DLL files are referenced in your project. All the Revit APIs are exposed by these interface files and your project can use all of those available APIs from them.
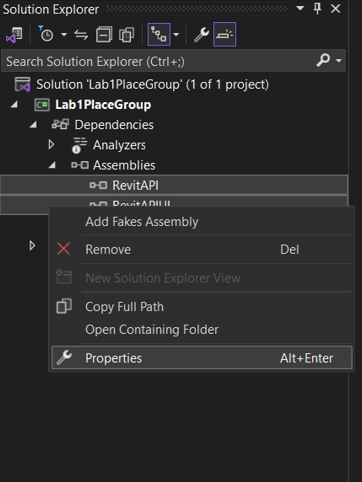
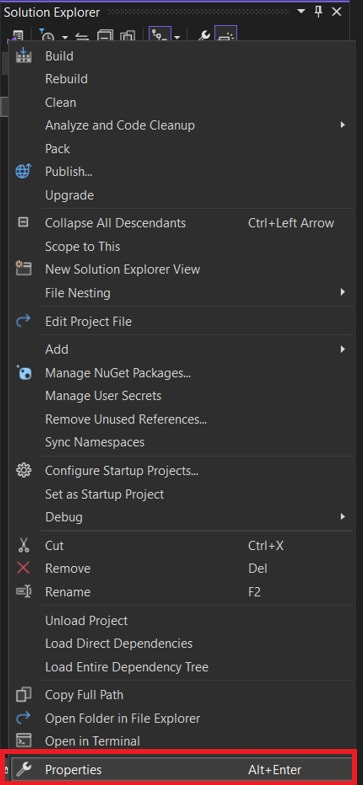
In the Solution Explorer window you saw in step 4, right click RevitAPI under Assemblies node and choose properties. In the Properties window, click Copy Local property, and then click the drop-down list, select No. Repeat the same steps to change RevitAPIUI's Copy Local property value to No.

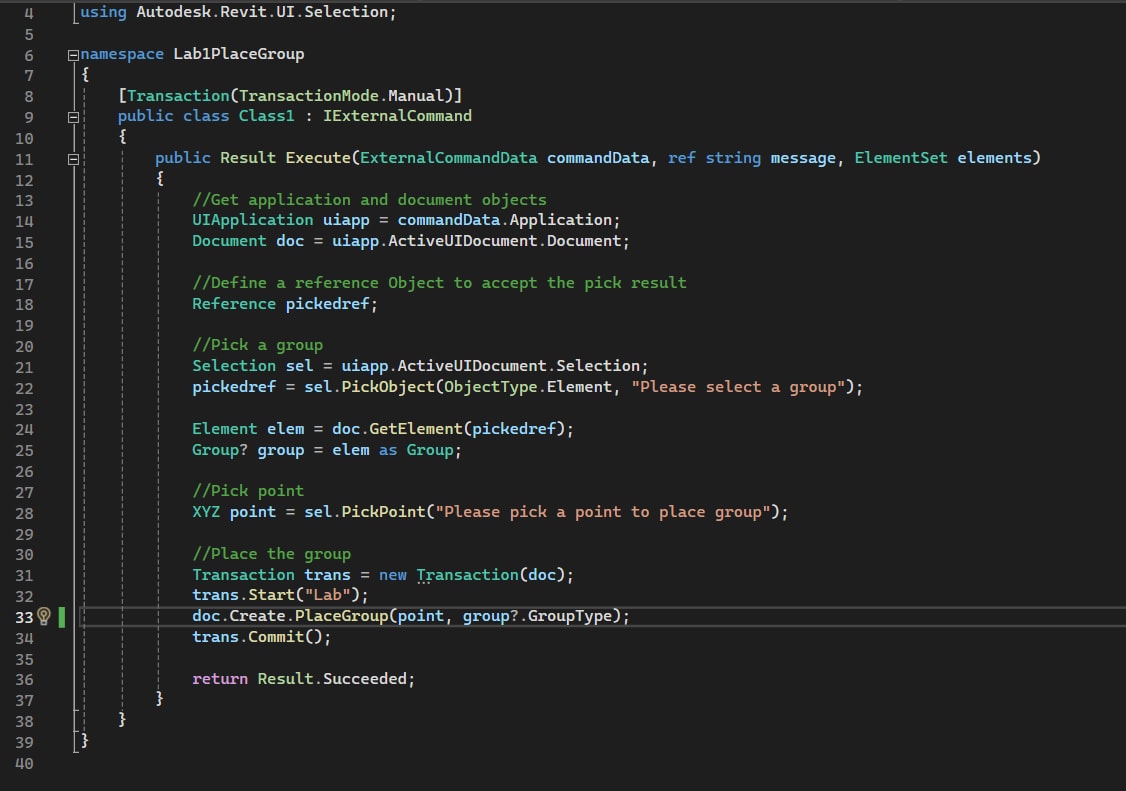
Double click Class1.cs in the Solution Explorer window to show the code-editing window. Delete everything in this window and then type the following C# code. To get the full experience of developing with Visual Studio – including the use of features such as IntelliSense – we recommend you type the code from this guide rather than copying and pasting it. That said, if constrained for time you can also copy and paste into the Visual Studio code window: although this reduces the experience you gain from working with the code directly.
using Autodesk.Revit.DB;
using Autodesk.Revit.Attributes;
using Autodesk.Revit.UI;
using Autodesk.Revit.UI.Selection;

namespace Lab1PlaceGroup
{
    [Transaction(TransactionMode.Manual)]
    public class Class1 : IExternalCommand
    {
        public Result Execute(ExternalCommandData commandData, ref string message, ElementSet elements)
        {
            //Get application and document objects
            UIApplication uiapp = commandData.Application;
            Document doc = uiapp.ActiveUIDocument.Document;

            //Define a reference Object to accept the pick result
            Reference pickedref;

            //Pick a group
            Selection sel = uiapp.ActiveUIDocument.Selection;
            pickedref = sel.PickObject(ObjectType.Element, "Please select a group");

            Element elem = doc.GetElement(pickedref);
            Group? group = elem as Group;

            //Pick point
            XYZ point = sel.PickPoint("Please pick a point to place group");

            //Place the group
            Transaction trans = new Transaction(doc);
            trans.Start("Lab");
            doc.Create.PlaceGroup(point, group?.GroupType);
            trans.Commit();

            return Result.Succeeded;
        }
    }
}
Don't worry about the details of the code for now, you'll come back to this shortly in the next couple of lessons.
The code you have written is in human readable form. To make the code readable by a computer, you will need to translate it or “build” it.
Inside Visual Studio, in the Build menu, click Build Solution to compile and build your plug-in. Build Success message shows in status bar of the Visual Studio window if the code is successfully built.
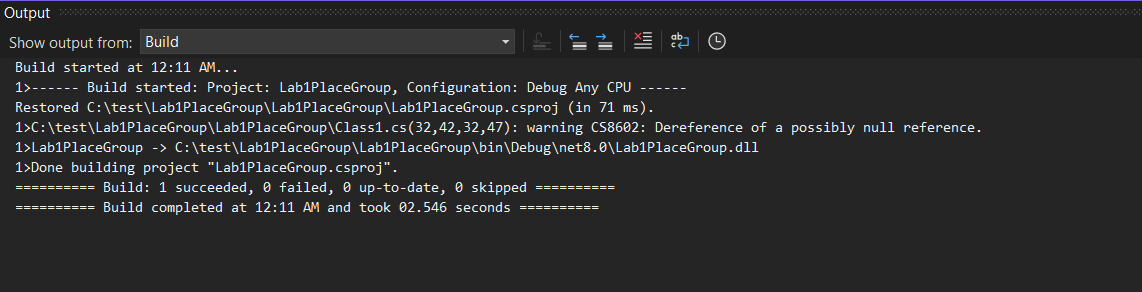
After building the solution, you will encounter numerous warnings displayed in the output window located at the bottom of the Visual Studio interface.
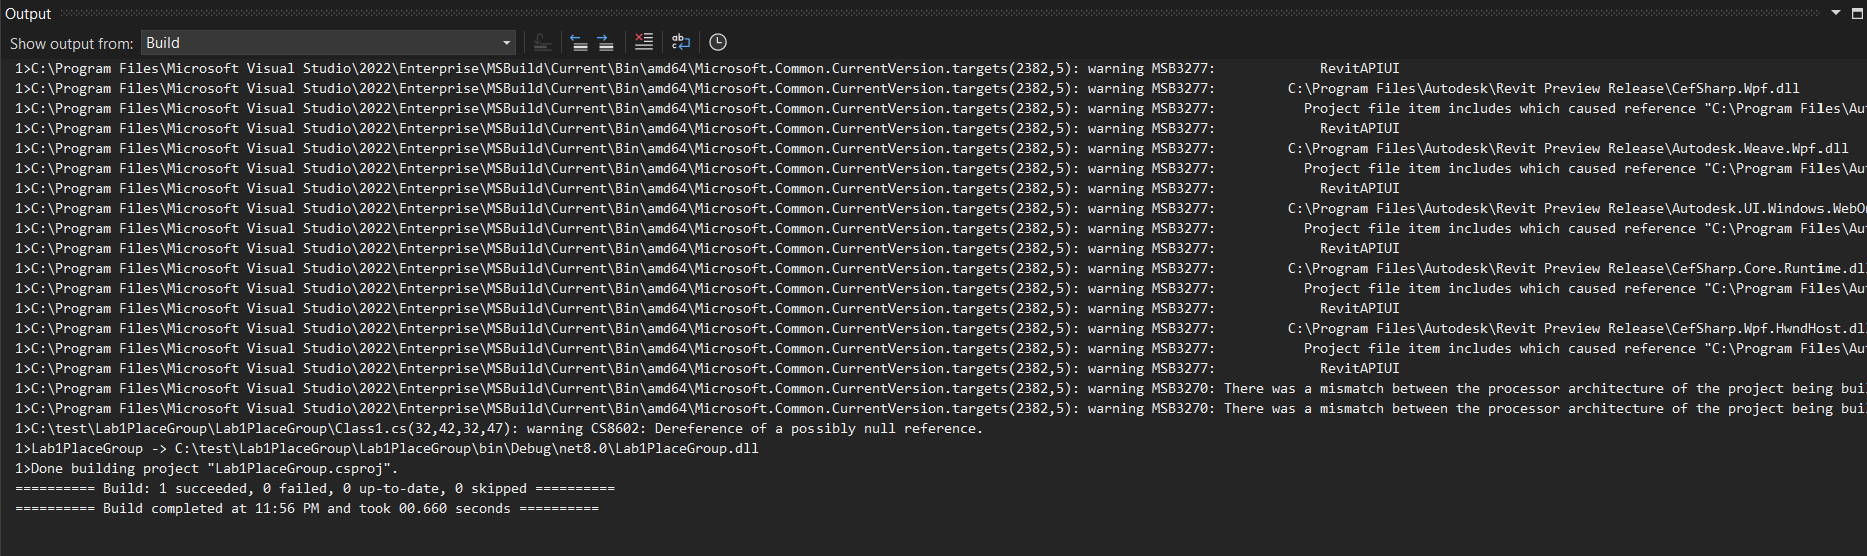
In this tutorial code, they are benign.
To suppress these warnings, follow these steps:
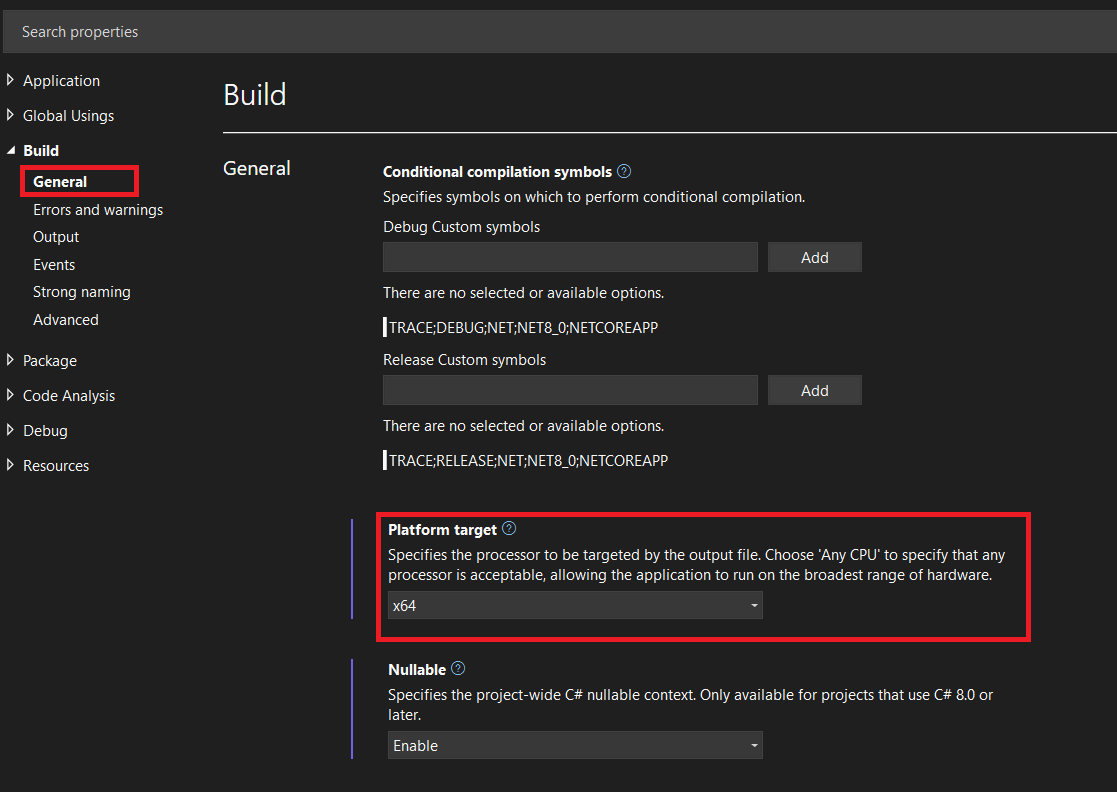
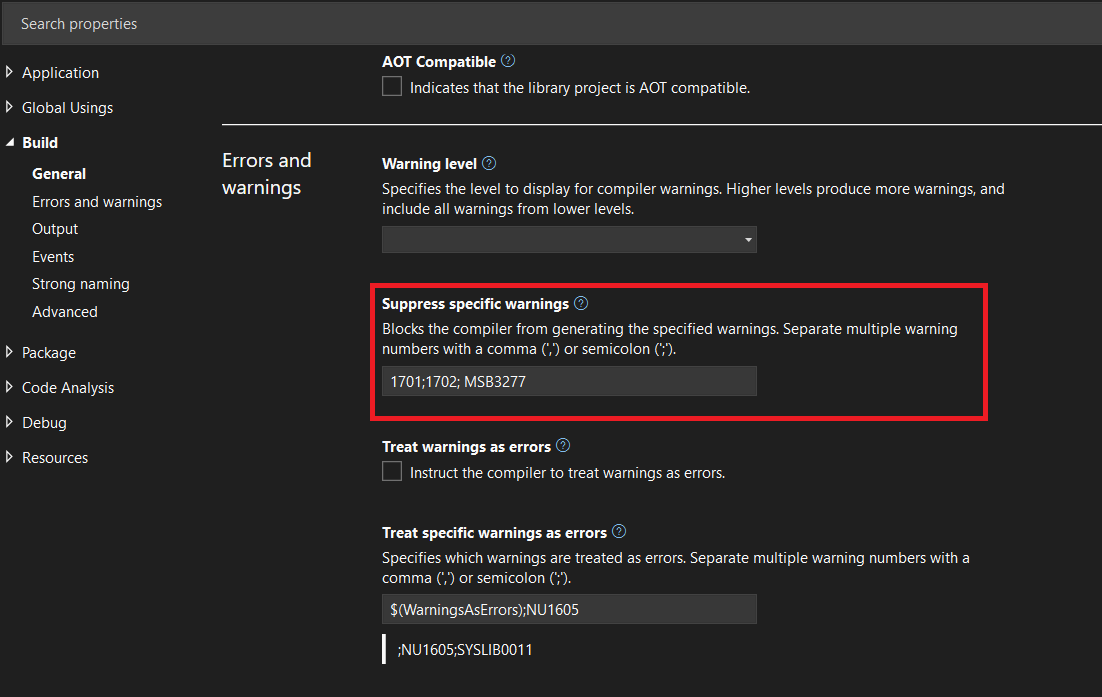
Once these settings are configured:
Upon completion of the build process, you will observe that the warnings are successfully suppressed, and the status bar of the Visual Studio window will display the message "Build succeeded."
That’s it! You have just written your first plug-in for Autodesk Revit.
Before you actually work with the plug-in in Revit, you will need to do one more step, which is to write an AddIn manifest.
Writing an AddIn Manifest
An AddIn manifest is a file located in a specific location checked by Revit when the application starts. The manifest includes information used by Revit to load and run the plug-in.
<?xml version="1.0" encoding="utf-8"?>
<RevitAddIns>
 <AddIn Type="Command">
       <Name>Lab1PlaceGroup</Name>
       <FullClassName>Lab1PlaceGroup.Class1</FullClassName>
       <Text>Lab1PlaceGroup</Text>
       <Description>Places the Group at Particular Point</Description>
       <VisibilityMode>AlwaysVisible</VisibilityMode>
       <Assembly>C:\test\Lab1PlaceGroup\Lab1PlaceGroup\bin\Debug\net8.0\Lab1PlaceGroup.dll</Assembly>
       <AddInId>502fe383-2648-4e98-adf8-5e6047f9dc34</AddInId>
    <VendorId>ADSK</VendorId>
    <VendorDescription>Autodesk, Inc, www.autodesk.com</VendorDescription>
 </AddIn>
</RevitAddIns>
Depending on the environment you are working on, you may need to change the path here to match your Lab1PlaceGroup.dll location on your computer:
C:\test\Lab1PlaceGroup\Lab1PlaceGroup\bin\Debug\net8.0\Lab1PlaceGroup.dll
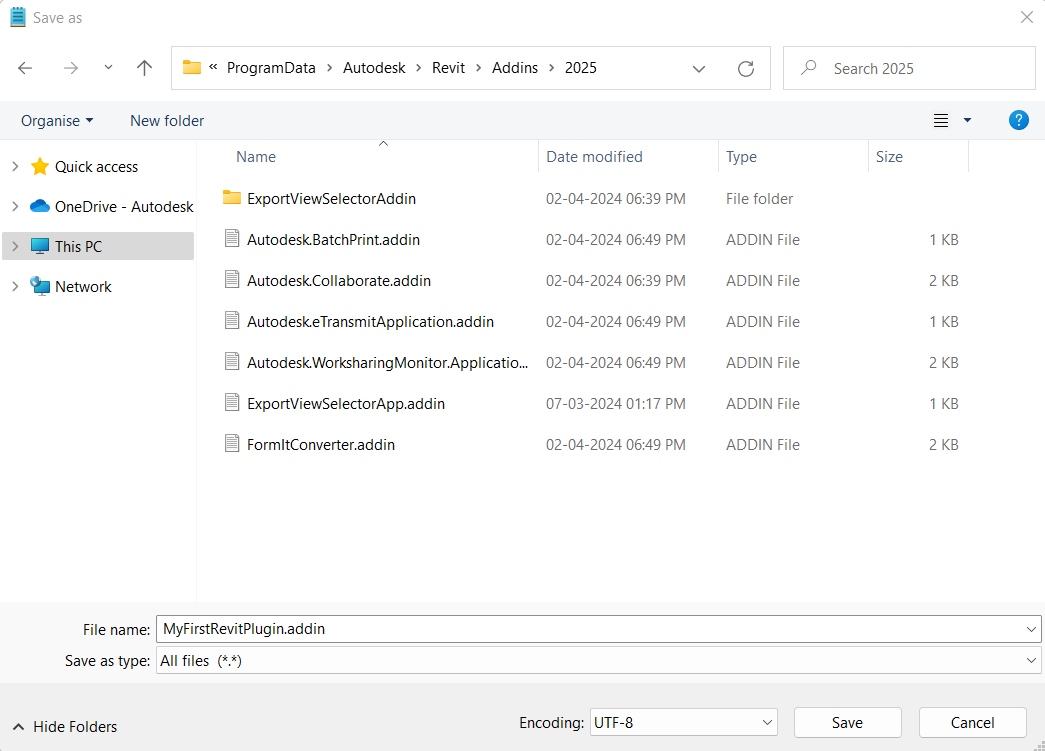
Under Windows 10 - C:\ProgramData\Autodesk\Revit\Addins\20xx\ (The ProgramData folder is hidden by default)
For example, here is the setting in Save As dialog in Windows 10 for Revit 2025.
Start Revit. Open the sample model HOTEL.rvt.
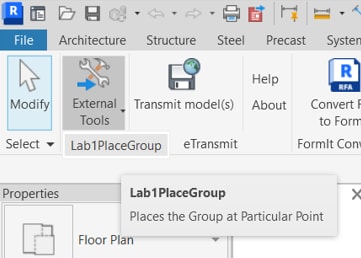
Inside Revit on the Add-Ins ribbon tab, click the External Tools drop-down list, then click Lab1PlaceGroup. This will start your plug-in.
Move the cursor over Room1 in the Revit building model. When the cursor is hovering over the furniture group, its bounding box should be highlighted as per the below picture, with a tooltip showing Model Groups : Model Group : Group 1. Click to select this furniture group. (Note: when highlighted the room looks very similar to the group. Please carefully select the group according to the message in the tooltip. If the room is selected, you will not see the expected result after the following step.)
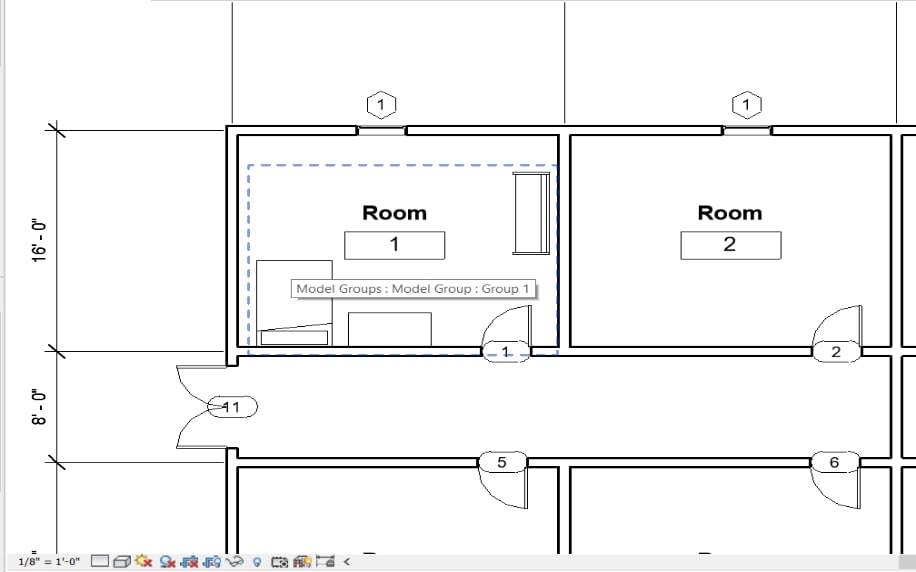
NOTE: Make sure the TOOLTIP message is ModelGroups, then click to pick.
Congratulations! You have just written your first plug-in for Autodesk Revit. You will be reviewing the code in detail in Lesson 3.
Before you move on to the next lessons, let us go back to some of the things we skipped over earlier, starting with basics concept about programming, and the benefits it can bring to your day-to-day work.
Additional Topics
Introduction to Programming
The C# code you have just executed to copy a group is only 30 lines long. Here you see a small amount of code working in a similar way to the internal Revit command, Create Similar. Software programming allows you to capture the logic of a particular functionality once and then reap the benefits over and over again, every time you want to perform this functionality.
What is Programming?
A simple answer to this question is: Computer programming is the process of creating a sequence of instructions to tell the computer to do something. You can look at your program as a sequence of instructions. During the course of the upcoming lessons, you will look at the various lines and blocks of code and look at them all in the context of being instructions for a computer.
If you were to explain what computers are to a young child, you might say: a computer is a tool which follows instructions you provide. Programming is one way of giving instructions to the computer. Internally, a computer sees these instructions encoded as a series of numbers (also called machine code). The human-readable instructions you saw at the beginning of this lesson is called source code and the computer converts these instructions to machine code which it can then read and execute. A sequence of such instructions (or code), written to perform a specific task, is called a program and a collection of such programs and related data is called a software. Autodesk Revit is one such software product.
Source code can be written in different languages, just as humans use different languages to communicate between ourselves. The language you will be using in this guide is called C# (pronounced “C-Sharp”).
What is an API?
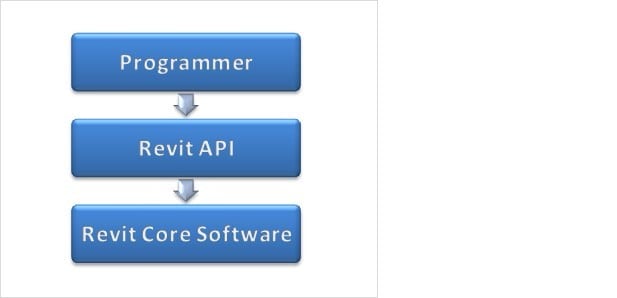
API is the acronym for Application Programming Interface: the way a software programmer can communicate with a software product. For instance, the Revit API is the way programmers can work with Revit, and it establishes what functionality a software programmer can use within Revit. Such as the Revit API allows you to write instructions for Revit to execute one after the other.
What is a Plug-in?
A software plug-in is a type of program module (or file) that adds functionality to a software product, usually in the form of a command automating a task or some customization of the product’s behavior. When you talk about a plug-in for Revit – and you will also hear the term Add-In used for this product – we mean a module containing code that makes use of the Revit API. Revit loads such plug-ins and uses them to adjust its behavior under certain conditions, such as when a particular command is executed by the user of the plug-in.
Was this information helpful?
The Assistant can help you find answers or contact an agent.
What level of support do you have?
Different subscription plans provide distinct categories of support. Find out the level of support for your plan.